Audience
- HelpCenter
- Audience
Subscriber information
Managing subscriber data is a crucial aspect of maintaining an accurate and engaged Contact List at Sendimpactt. You can easily add, remove, or update subscriber details such as email addresses, names, countries, companies, and more. Here's how you can edit a subscriber's data:
- Navigate to the “Contact list” within your Sendimpactt account.
- Click on the “Subscriber tab” and select the desired List
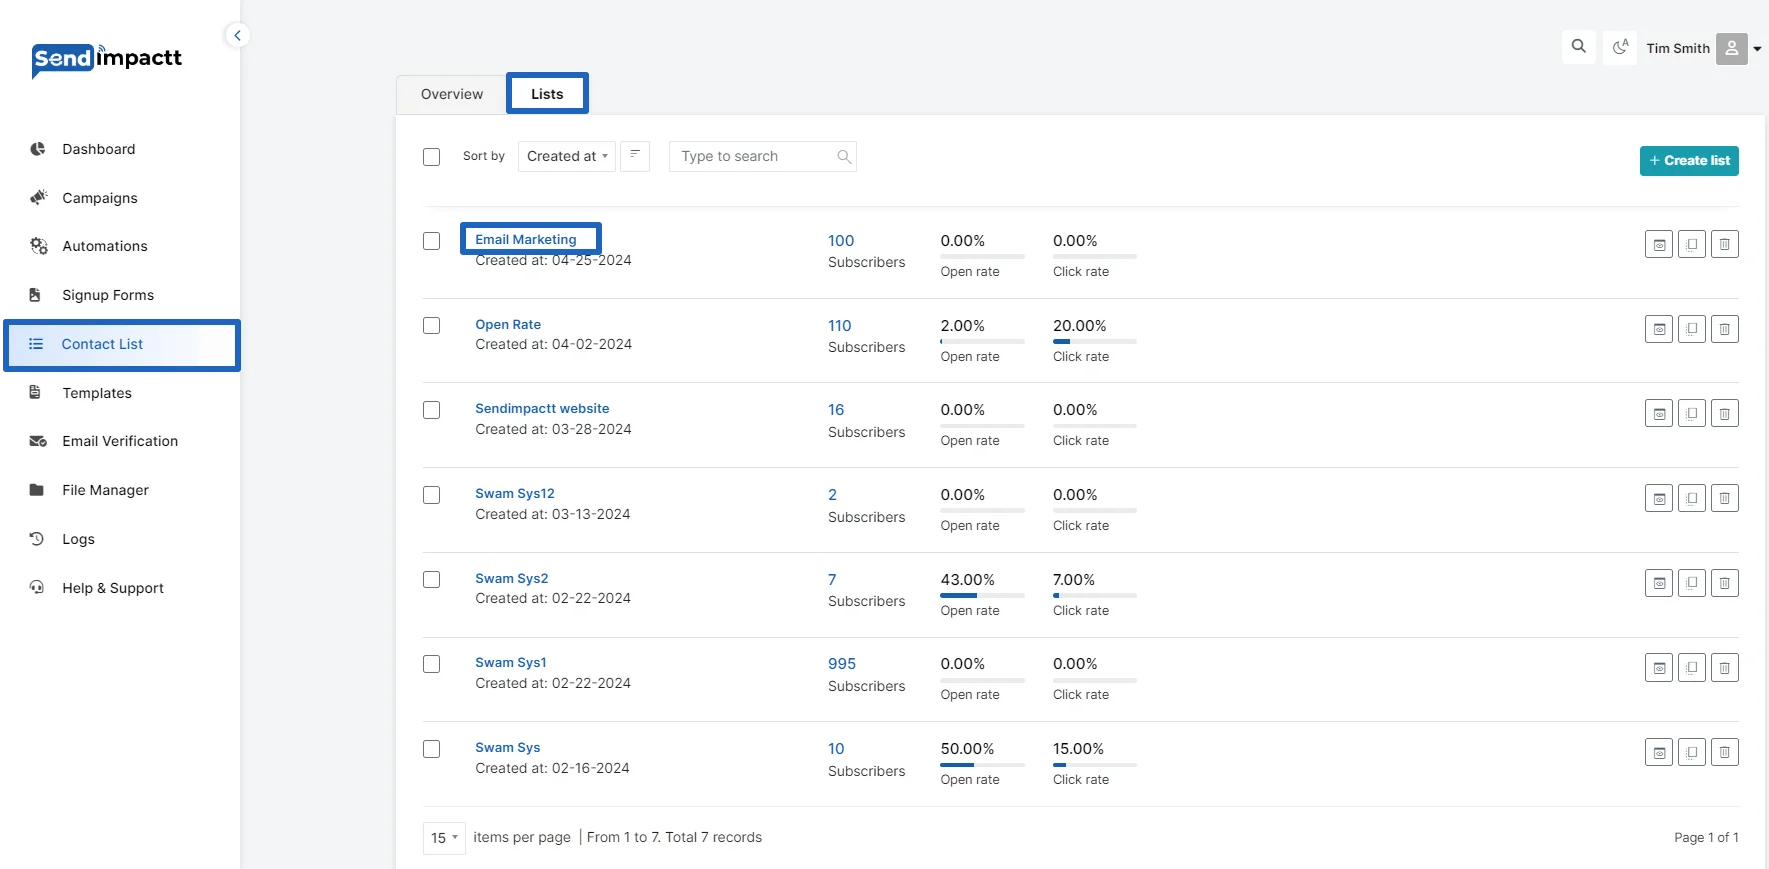
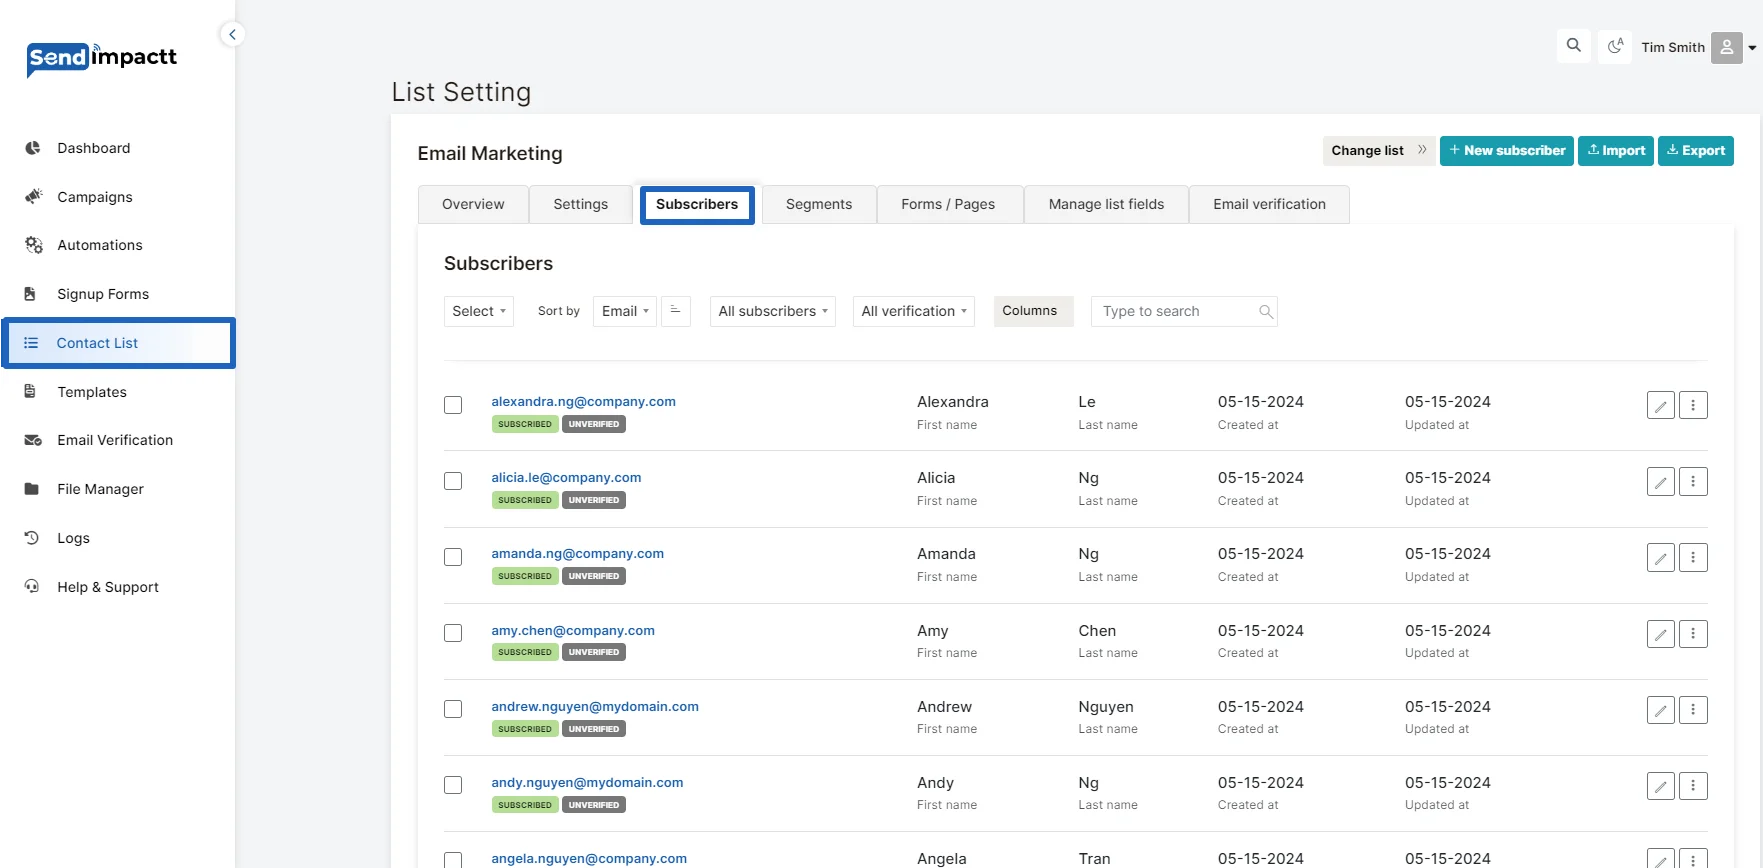
- To access their profile click on the email id for which we want to change the data.
- Scroll down to the Subscriber details section and click on the Edit button.
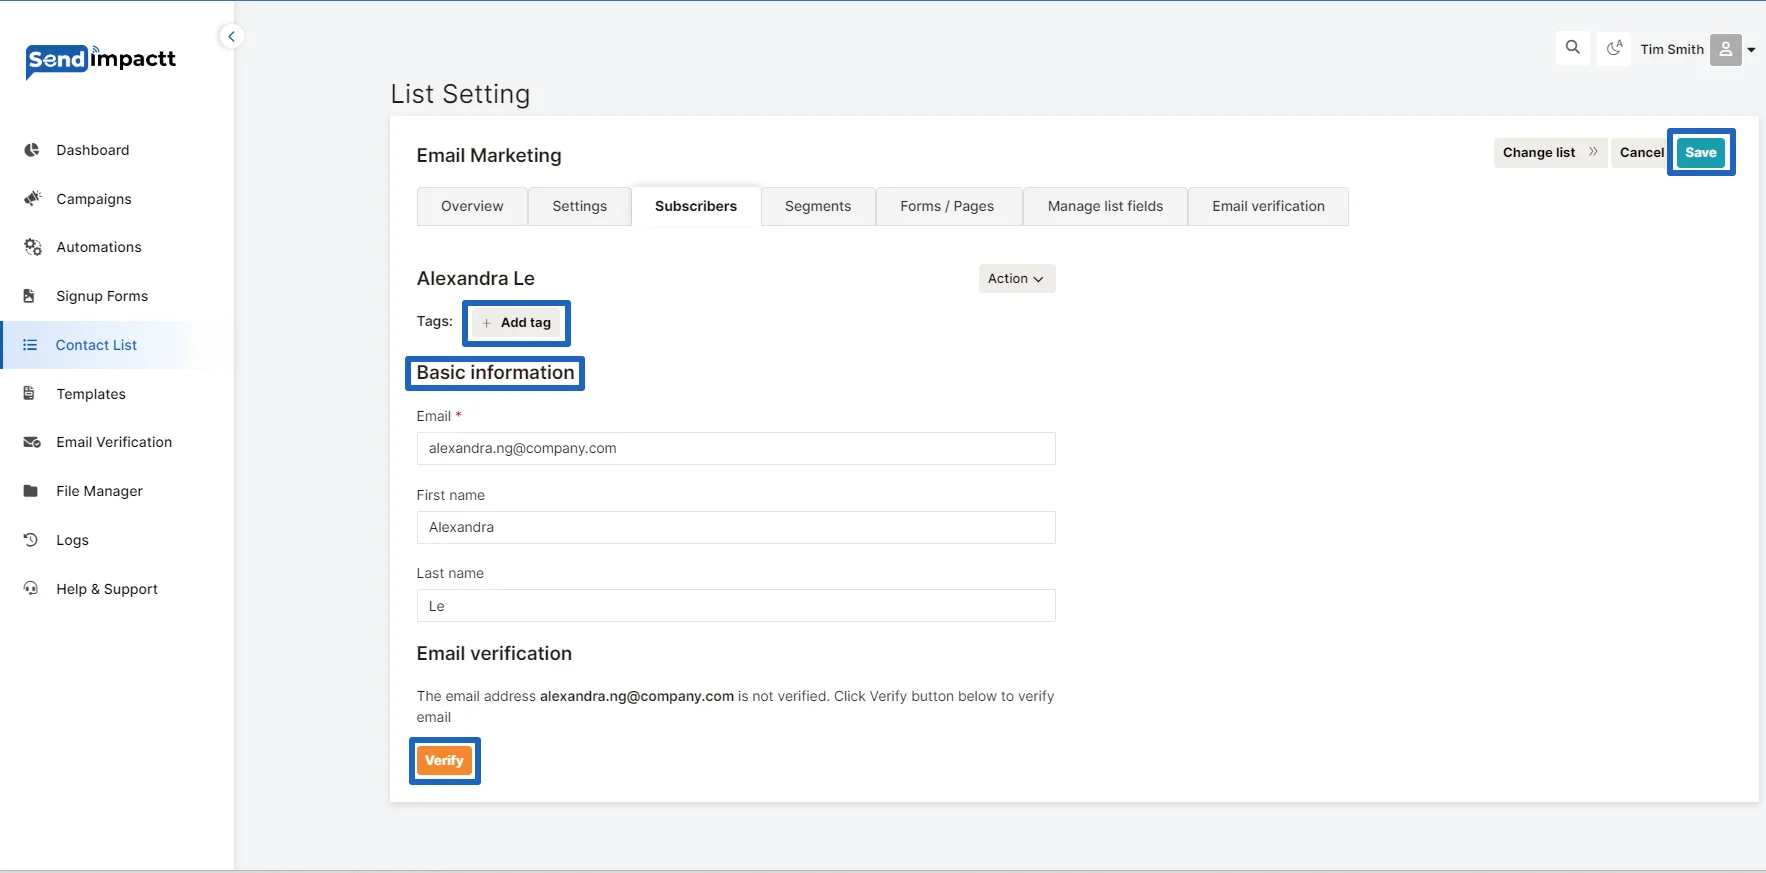
- Make the necessary changes to the subscriber's details.
- You can also Add tags, and verify the email(if you have the email verifications credits)
- Once you've finished editing, click on Save changes to update the subscriber's information.
It's important to note a few key points:
- Editing a subscriber's email address is limited to once per month.
- Any updates made to an email address will be recorded in the Activity section of the subscriber's profile for transparency and tracking purposes.
By following these steps, you can efficiently manage and maintain the accuracy of subscriber data within your Sendimpactt account.
Once someone has successfully signed up to your email list, you can find them on the Subscribers page .
When you create a form or landing page to collect email addresses, you select a “contact list” into which subscribers of that form will be added. To find subscribers who were added to a specific LIST after completing a form:
- Click on the list
- Select the desired list which was used to store the contact of the form & Navigate to the Subscribers page
- Here you will see all the subscribers
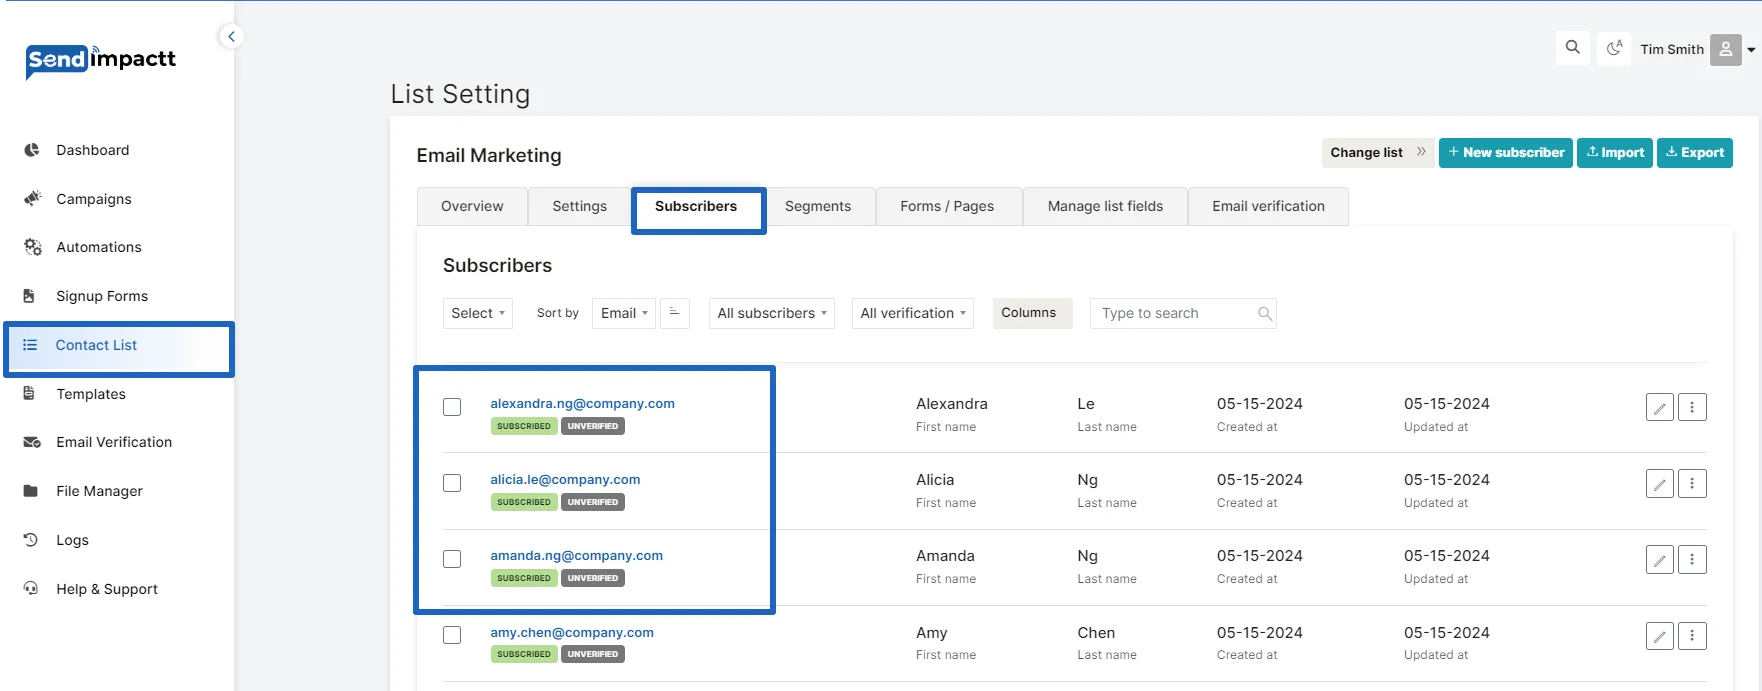
Importing subscribers into Sendimpactt is a seamless process that offers flexibility and convenience. Here, we'll outline the top three methods for importing subscribers:
- From a CSV or TXT file:
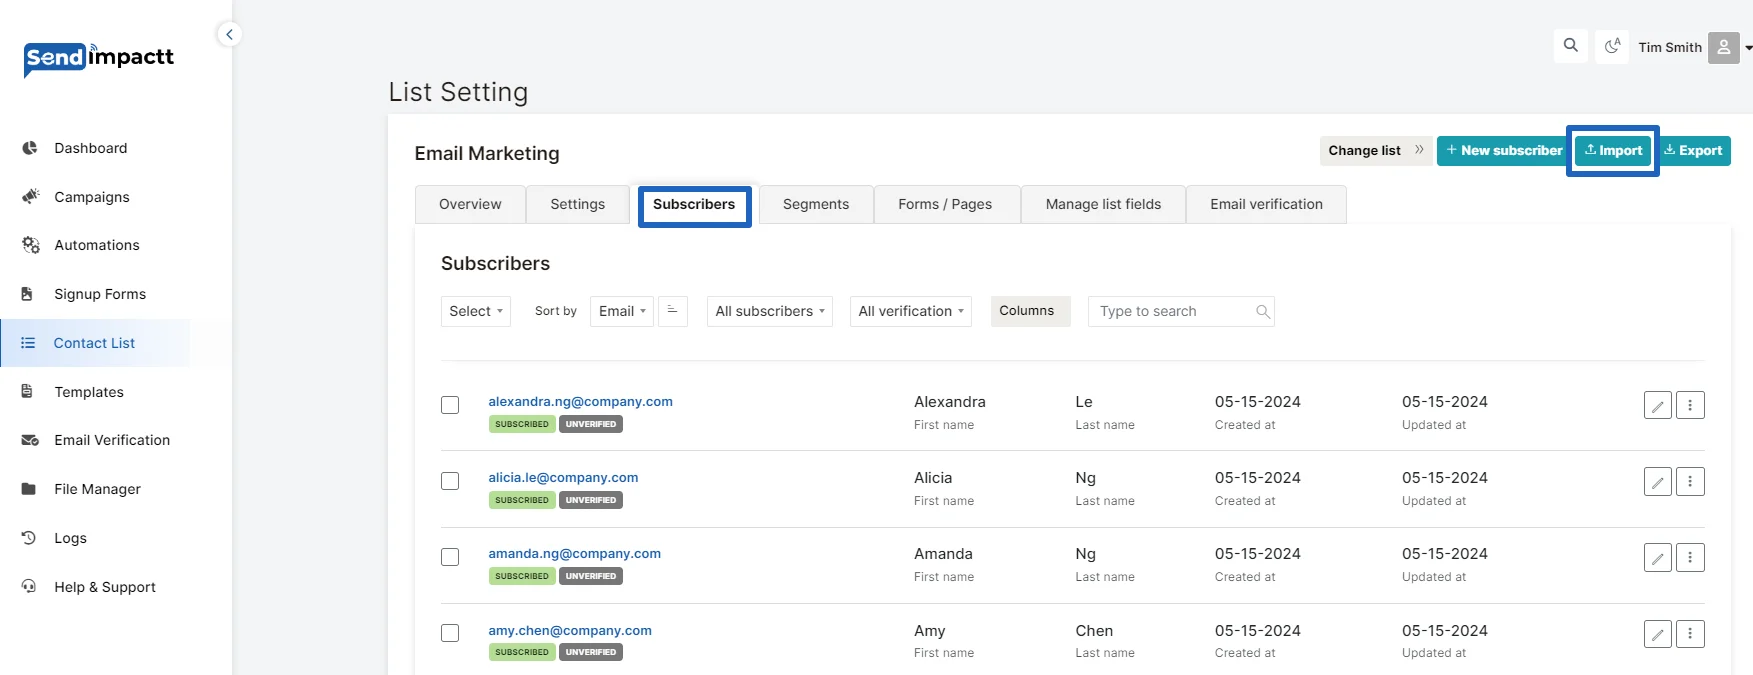
- Navigate to the Subscribers page and click on “Import”.
- Select it from your computer.
- Click Import subscribers.
- Proceed to the Import settings page to further customize the import.

- Manually adding a single subscriber:
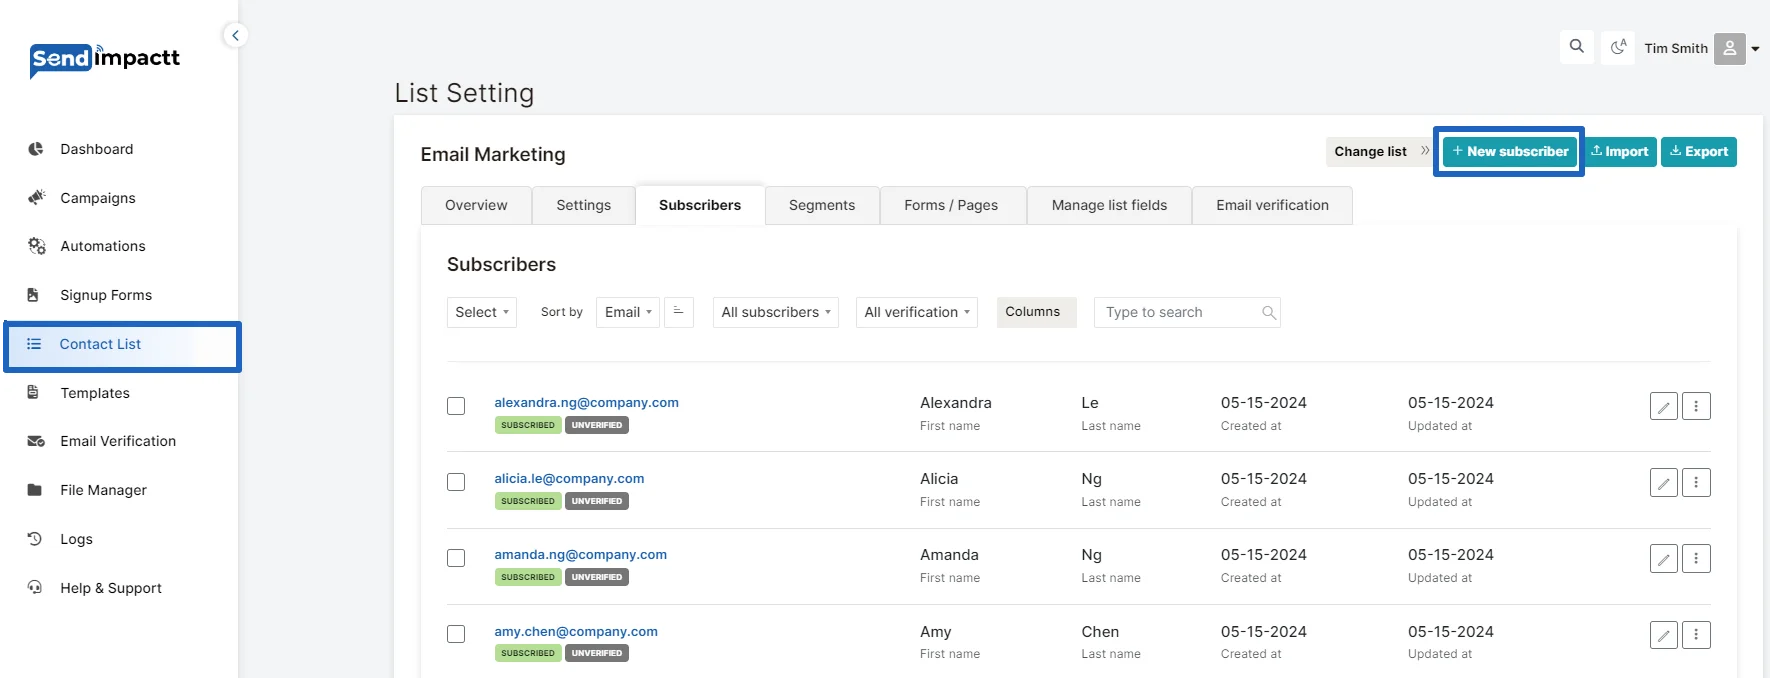
- Select the Add subscriber tab.
- Fill out the subscriber's Email and Name fields.
- Optionally, add more fields
- Click Save finalize the process.
After uploading your subscriber list, you'll be prompted to adjust import settings, including assigning subscribers to specific List and matching columns in your spreadsheet to fields in Sendimpacttt.
It's essential to verify that all subscribers have provided explicit permission to receive emails. Sendimpactt automatically removes duplicate email addresses to ensure recipients don't receive duplicate newsletters.
Importing subscribers does not trigger double opt-in confirmation emails, as it's assumed you've already obtained consent from your subscribers.
Here are some additional tips and considerations:
- Server's max upload file size is limited to 1024M. Make sure your input file does not exceed this limit.
- Acceptable file type is CSV with a header row containing the column / field names like EMAIL, FIRST_NAME, LAST_NAME...
- You can download a sample input file here (Sample.csv)
- All information should be contained within one sheet in the spreadsheet.
- Avoid leading or trailing spaces in records.
- Review the import summary to identify any failed imports and reasons for failure, such as invalid email addresses or unsubscribed status.
Understanding subscriber statuses is crucial:
- Active: Subscribers eligible to receive emails.
- Unconfirmed: Subscribers who haven't confirmed their subscription.
- Bounced: Emails that have hard bounced and cannot be delivered.
- Unsubscribed: Subscribers who have opted out.
- Spam : Subscribers who marked your email as spam.
- Deleted: Removed from all lists but still stored in the system.
By following these guidelines, you can efficiently manage your subscriber list and ensure compliance with Sendimpactt's policies and regulations.
List and Segments
Lists in Sendimpactt are a fundamental feature designed to organize your contacts efficiently, enabling targeted email campaigns based on subscribers' interests. Here's an overview of how lists work and how to manage them effectively:
What are lists?
Lists serve as individual lists within Sendimpactt, allowing you to categorize your contacts based on specific criteria or interests. Similar to tags or Contact Lists in other email marketing platforms, lists facilitate targeted communication with subsets of your subscriber base.
How to create a list:
- Navigate to the Subscribers page.
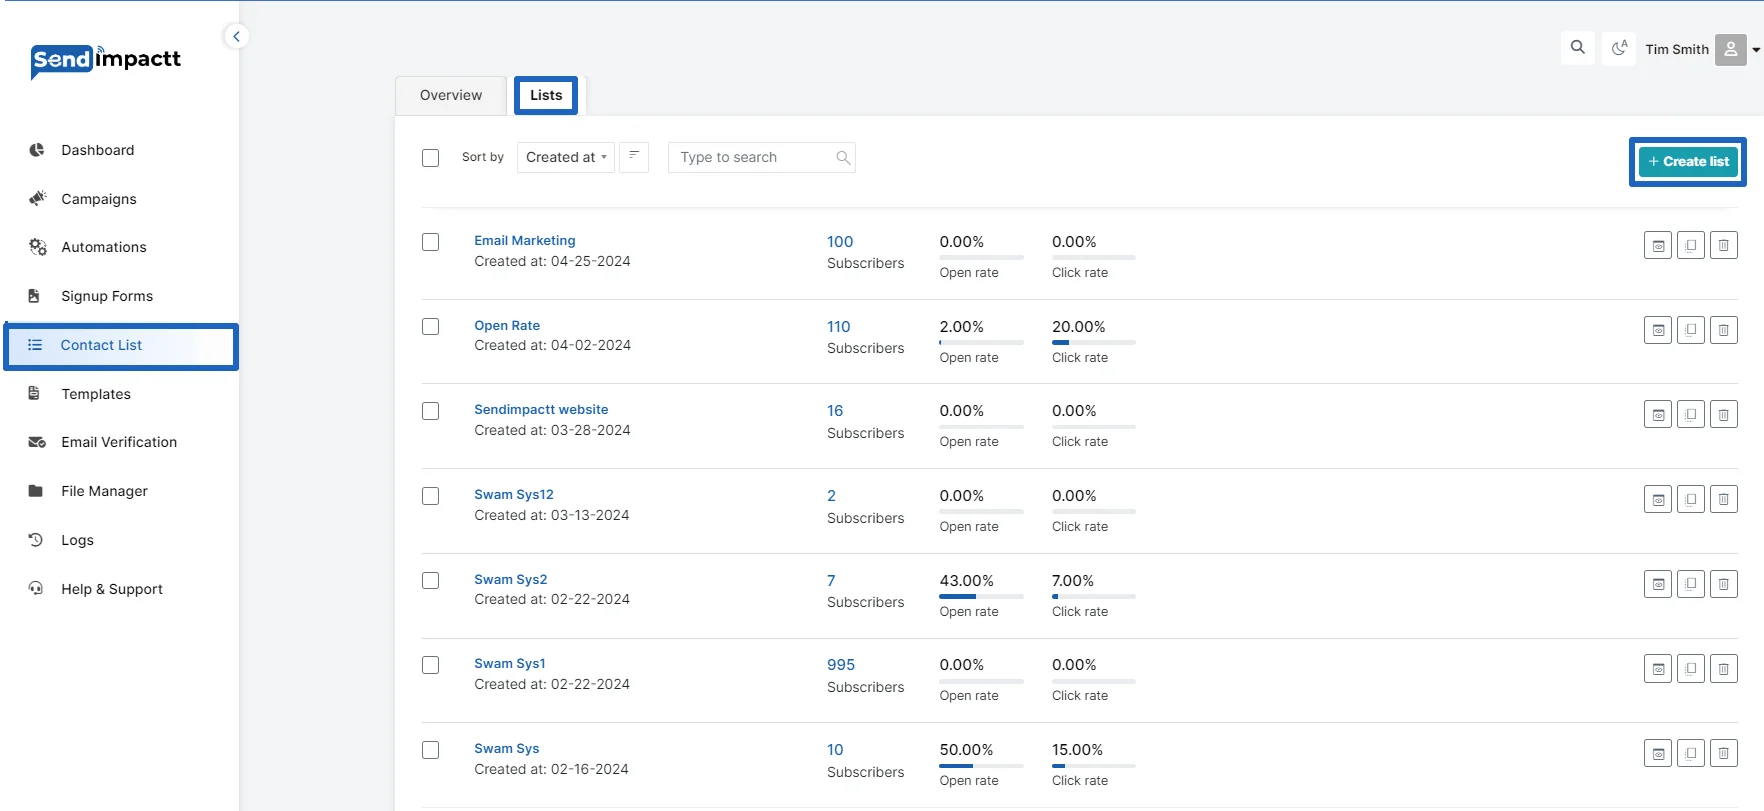
- Click on the Lists tab.
- Select Create list.
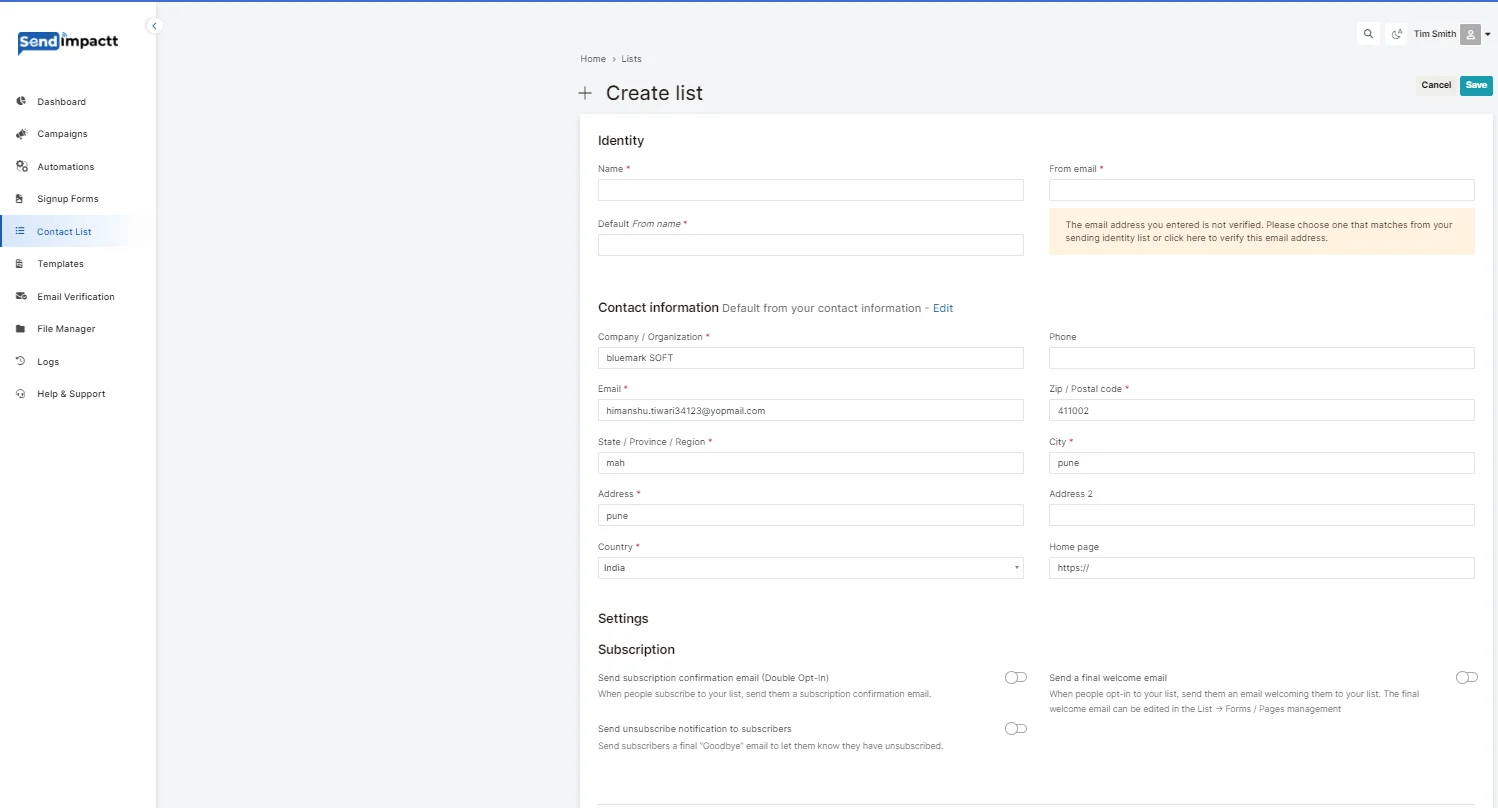
- Enter the name of your new list and click Create.
After creating list fill all the information
Creating a list while importing subscribers:
- Navigate to the Subscribers page.
- Click Add subscribers and proceed with your chosen import method.
- During the import settings, select a list or type the name of a new list to create it.
Adding existing subscribers to a list:
- Navigate to the Subscribers page.
- Select the desired subscribers.
- Click on Actions, then Add to list.
- Type the name of the list to select it or create a new list.
Moving a subscriber from one list to another:
- Add the subscriber to the new list as described above.
- Reselect the subscriber(s).
- Click Actions, then Remove from list.
- Select the list from which you are removing the subscriber(s) and click Remove.
Exporting a list:
- Navigate to the Lists tab within the Subscribers page.
- Find the desired list and click View list.
- Click Export above the subscribers list to export the list into a CSV file.
List statistics:
- Go to the Subscribers page and click on the Stats tab.
- Use the dropdown menu to select the list whose statistics you want to view.
- Analyze metrics such as open rate, click rate, subscribe rate, unsubscribe rate, subscriber engagement, and popular email clients.
By effectively managing lists in Sendimpactt, you can streamline your email marketing efforts and deliver more personalized content to your subscribers.
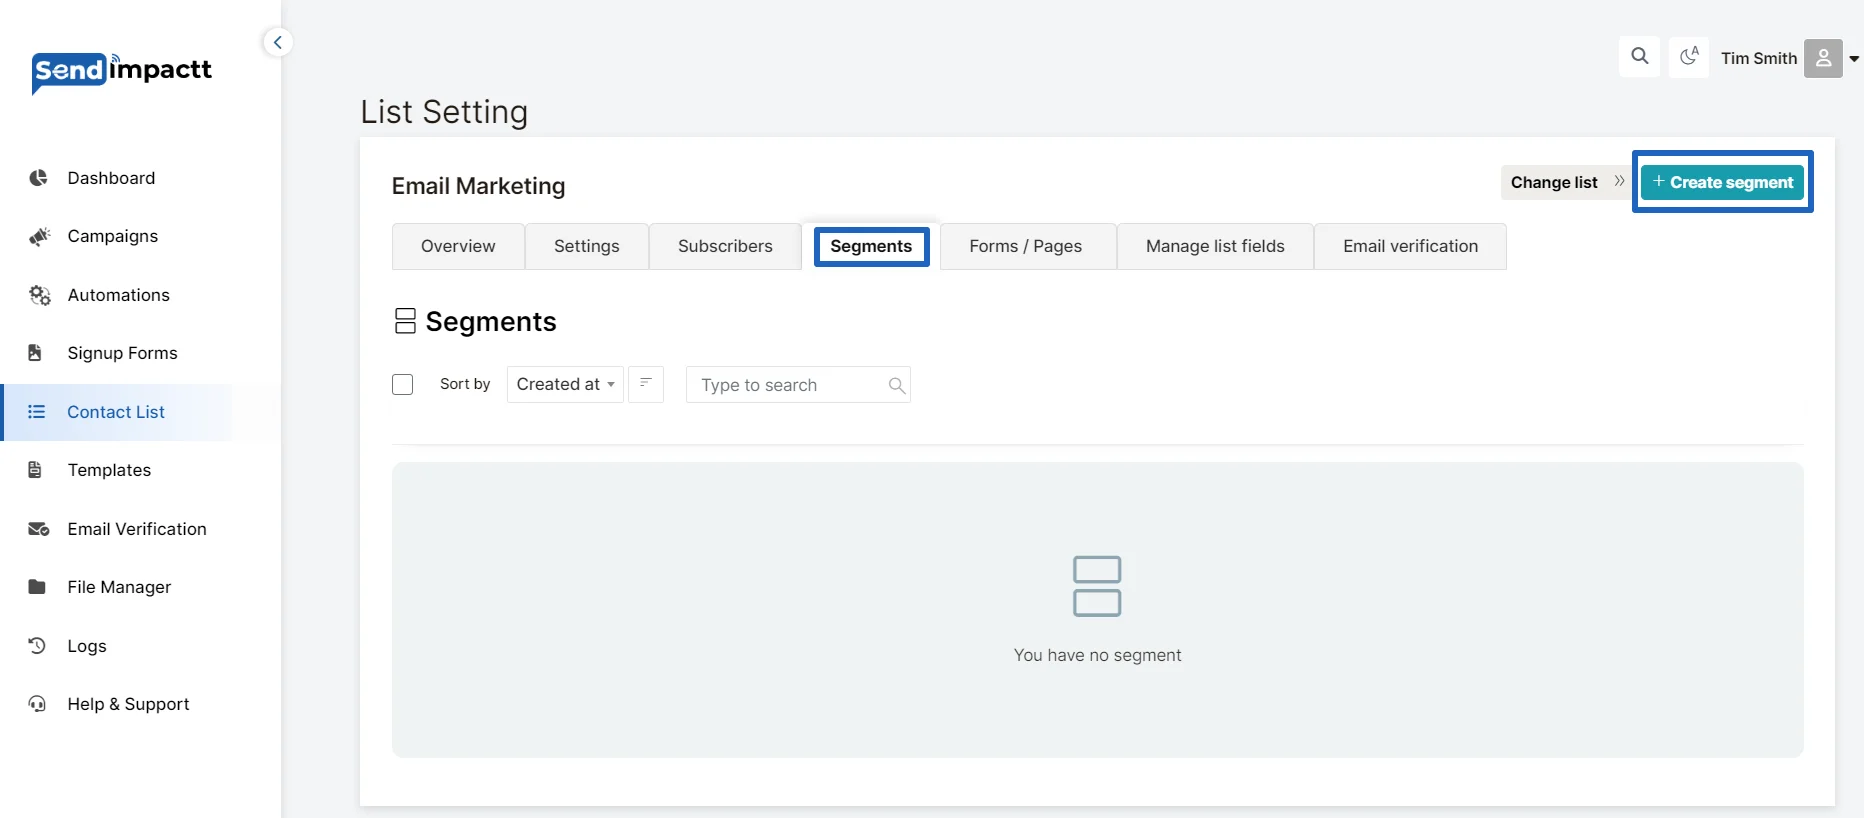
A segment in Sendimpacttt is a dynamically generated list of subscribers based on specific conditions, allowing you to target or organize particular Contact Lists within your mailing list effectively. Here's a comprehensive guide on creating, using, and managing segments:
Creating Segments:
- On the Subscribers page, under the All subscribers tab, apply the filter(s) that will define the conditions of your new segment.
- Once you've set the conditions, a green "Save as segment" button will appear. Click it to save all the subscribers who meet these conditions into a segment.
- Pay attention to whether you are creating "and" rules or "or" rules when setting conditions. Subscribers need to meet all "and" conditions or at least one "or" condition to be included in the segment.
- All past and future subscribers who meet the defined conditions will be automatically included in the segment.
Using Segments:
- Segments can be used as recipients of any campaign, or excluded from a campaign if you wish certain subscribers not to receive a particular newsletter.
- To include a segment in a campaign, simply select the segment as recipients during campaign setup.
- To exclude a segment from a campaign, click the "Exclude segment" button next to the segment you do not want to receive that newsletter. Note that exclusion supersedes inclusion if a subscriber belongs to multiple segments.
Using Segments in Automations:
- In automation workflows, you can use segments as conditions to alter the outcome of the workflow based on subscriber behavior.
- Add a Condition step to your workflow and set the condition as Segment membership, selecting the segment you wish to use as the condition. This will split your workflow into two paths based on whether subscribers are included in the segment or not.
Troubleshooting Segments:
- If your segment isn't working as expected, ensure that you've correctly created the filters using the appropriate "and" or "or" options.
- Double-check that subscribers meet the filter conditions by reviewing their profiles, accessible by clicking on their email address and scrolling down to Subscriber details.
Deleting Segments:
- To delete a segment, navigate to the Subscribers page, then click on the Segments tab.
- Select the segment(s) you wish to delete and click Delete. Note that deleting a segment only removes the segment itself, not the subscribers inside it.
Exporting Subscribers by Segment:
- To export subscribers by segment, navigate to the Segments tab within the Subscribers page.
- Click View segment for the desired segment.
- Click the Export button and select your preferred file type.
By effectively utilizing segments in Sendimpacttt, you can tailor your email marketing efforts to specific subscriber groups, improving engagement and relevance.
In Sendimpactt, subscribers are organized within lists and segments, each serving distinct purposes in managing your subscriber base effectively.
Segment:
- A segment is a dynamic list of subscribers defined by a rule or condition created with Sendimpactt's filters.
- Segmentation allows you to group subscribers based on common traits, enabling personalized and targeted campaigns.
- Segments are automatically updated as subscribers meet or no longer meet the defined rule.
- Examples of segmentation criteria include groups, fields, signup date, time zone, campaign engagement, and more.
- Subscribers can only be added or removed based on whether they meet the rule.
- Segments enhance campaign relevance, resulting in improved open and click rates.
List :
- A list, does not have specific rules or criteria for inclusion. Instead, subscribers are manually added or removed based on your preferences.
- Lists are not updated automatically and only change when subscribers are manually moved or through automation actions.
- Subscribers can be filtered before adding them to a list, allowing for manual selection based on specific criteria.
- Lists are useful for organizing subscribers without common criteria or for lists that you want to manage manually.
- You can use lists for various purposes such as sending campaigns, importing subscribers, setting up automation triggers, and managing sign-up forms.
When to Use Lists vs. Segments:
Situation | Segment | List |
Sending a campaign | ✓ | ✓ |
Importing subscribers from a file | ✓ | ✓ |
Setting up an automation trigger | ✓ | ✓ |
Creating a list that updates automatically | ✓ | |
Creating a list that you can update manually | ✓ | |
Using a sign-up form (pop-up, embedded, site) | ✓ |
In summary, segments are ideal for automating subscriber categorization based on specific criteria, while lists offer manual control over subscriber organization. Both lists and segments play crucial roles in targeted marketing efforts, allowing for tailored campaigns to enhance engagement and relevance.
Unsubscription management
Your Sendimpactt Contacts serves as a centralized hub for managing all your contacts, whether they are subscribed, unsubscribed, non-subscribed, or cleaned. Unsubscribed contacts are individuals who previously received your emails but have chosen to opt out.
Here's how you can view your unsubscribed contacts:
- Access Your Contacts:
- Click on "Contact List" from the Sendimpactt dashboard, then select "List”
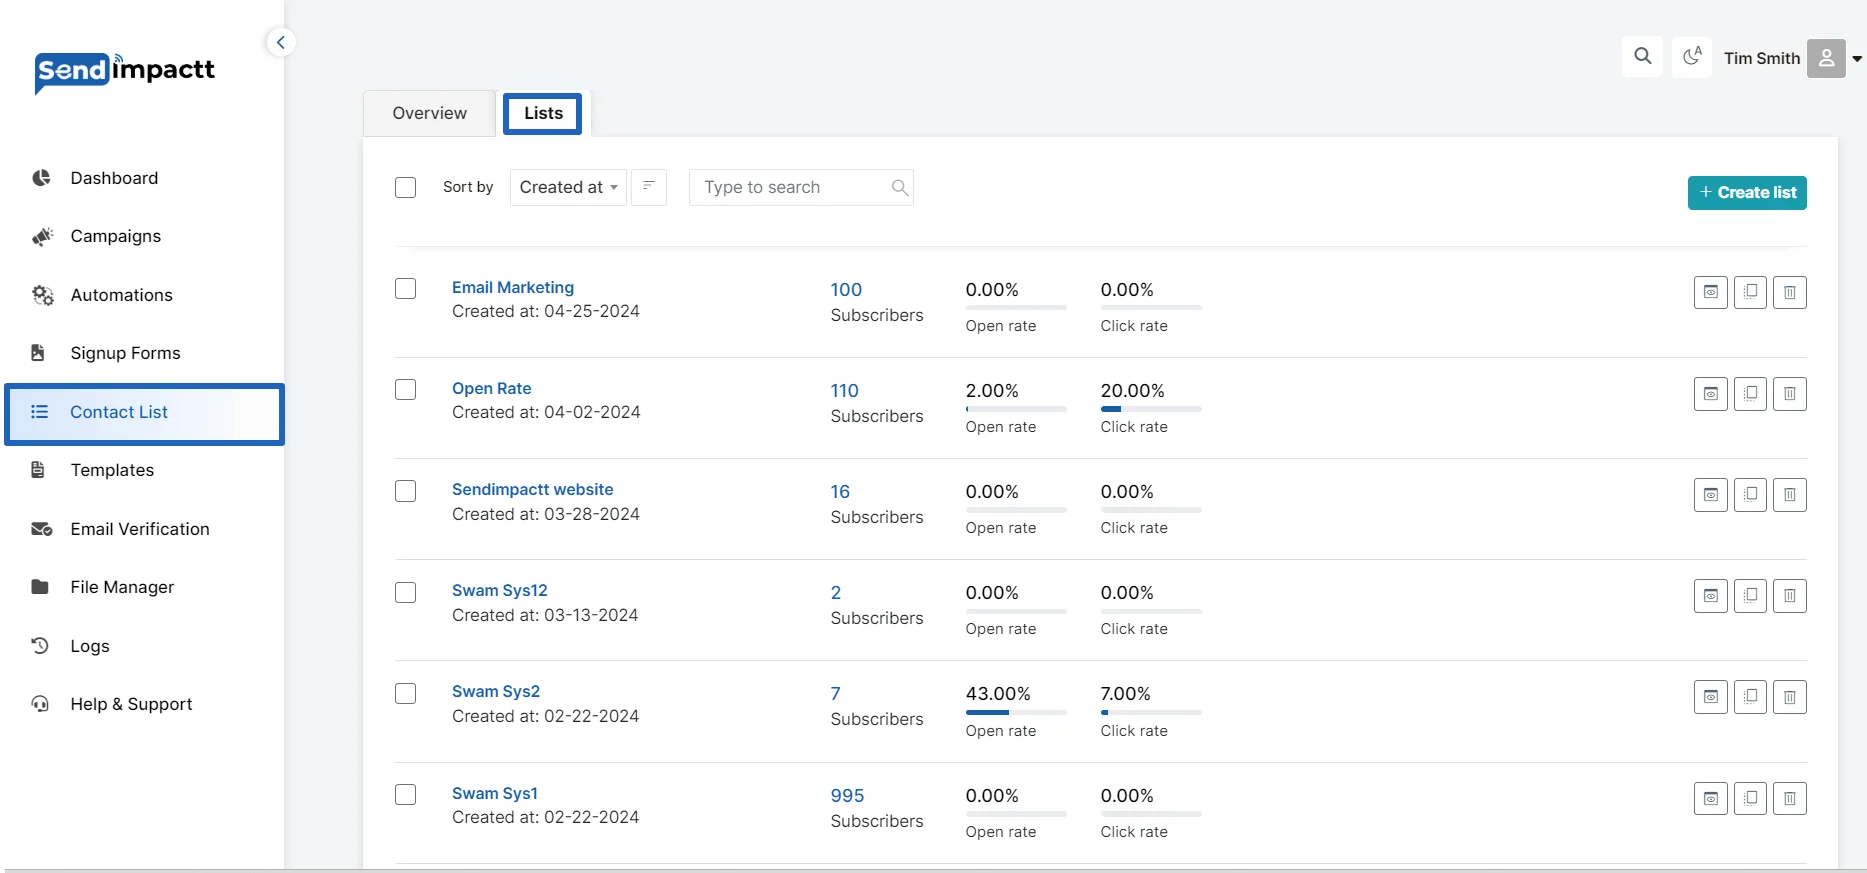
Select the relevant list on which you want to check the unsubscribed emails.
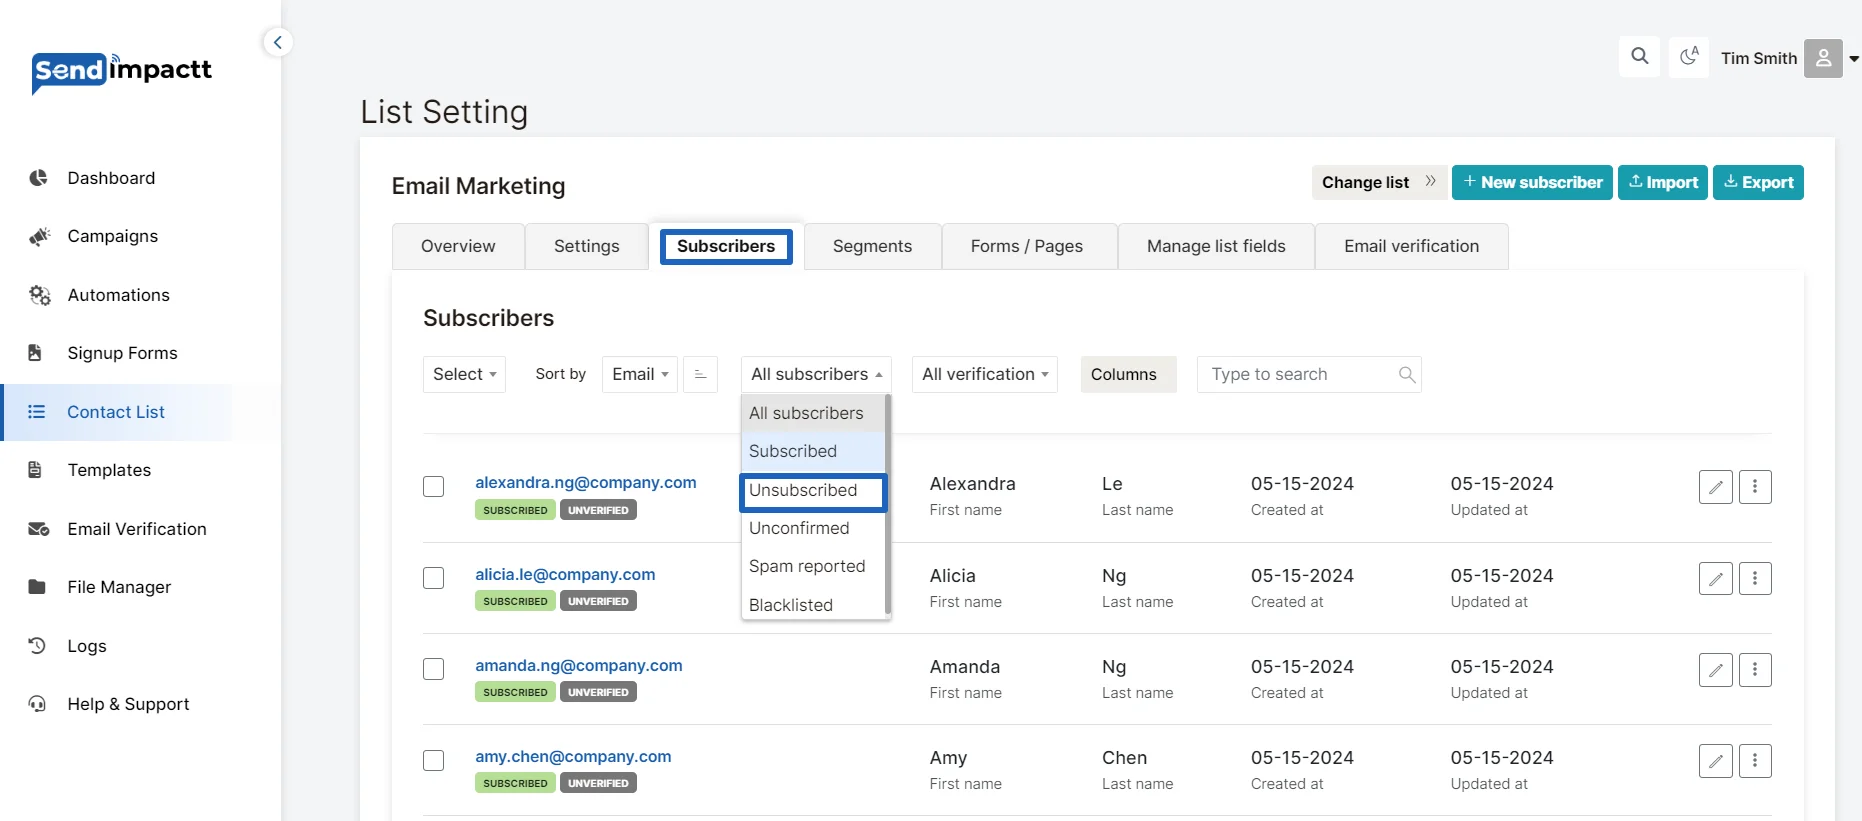
- You can view and manage your unsubscribed contacts from here
You can also do the following settings at the list level:
- Subscribe
- Unsubscribe
- Copy to
- Move to
- Send confirmation email
- Delete
By following these steps, you can easily view and manage your unsubscribed contacts in Sendimpactt. If you want to learn more about how unsubscribes work in Sendimpactt, you can check out the "About Unsubscribes" section for additional information.
Manually unsubscribe the recipients:
Here's how you can view your unsubscribed contacts:
- Access Your Contacts:
- Click on "Contact List" from the Sendimpactt dashboard, then select "List”
- Select the relevant list on which you want to unsubscribe emails.
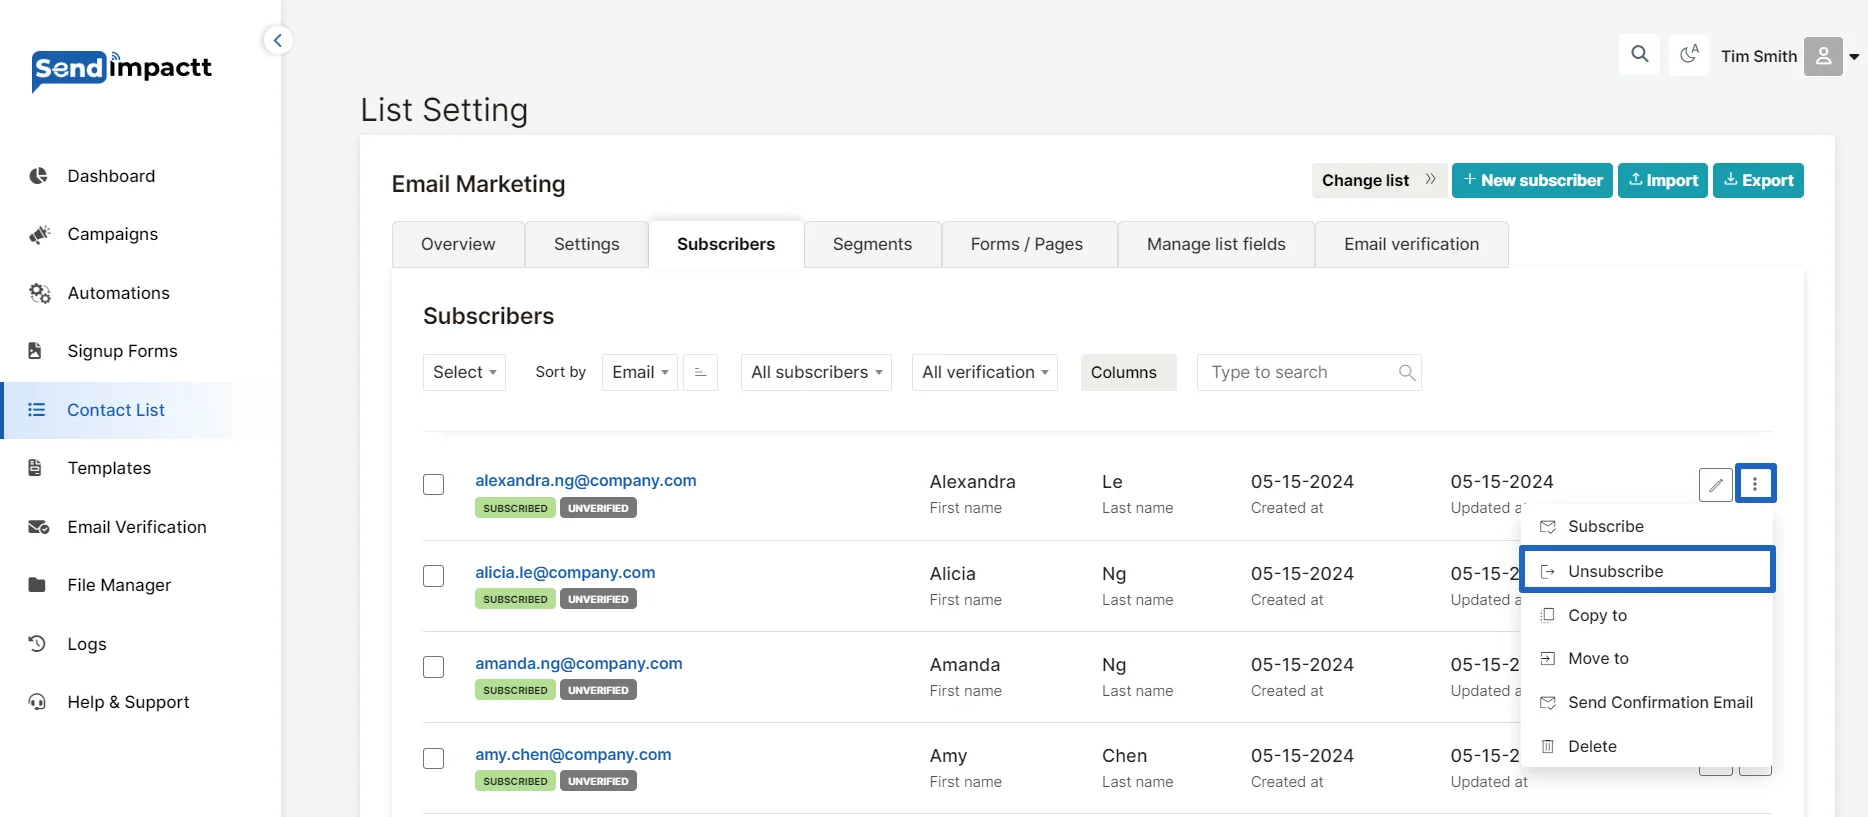
- Click on the three dot on the right of the email
- Click on unsubscribe
Now this email will not receive any communication.
Unsubscribed recipients are individuals who have indicated that they no longer wish to receive your newsletters. This could be due to various reasons, such as clicking the unsubscribe link in your newsletter's footer, being unsubscribed during a cleanup of inactive subscribers, or being manually unsubscribed by you.
Here's what happens to unsubscribed recipients:
- Automatic Removal: Unsubscribed recipients are automatically removed from your active subscriber list as soon as they unsubscribe. This means they will no longer receive newsletters or be included in your automation workflows.
- Location in Subscribers Page: Unsubscribed recipients can be found on the Subscribers page under the All subscribers tab when you select to view Unsubscribed.
Finally, if you need to reactivate an unsubscribed recipient, follow these steps:
- Find the Subscriber from the list
- Reactivate: Click the Actions button followed by Subscribe.
It's important to note that you cannot reactivate unsubscribed recipients in bulk..
Note: Need to check from developer team
Custom fields
At Sendimpacttt, a custom field is a designated space to capture specific information provided by subscribers through signup forms. Unlike standard fields, which include default categories like Name, Last name, Email, Phone, Company, Country, State, City, and Zip, custom fields offer the flexibility to gather additional data tailored to your needs.
Creating custom fields is a straightforward process:
- Navigate to the Contact List page on your Sendimpacttt account.
- Locate the “Manage the List Fields” tab after creating the List Group.
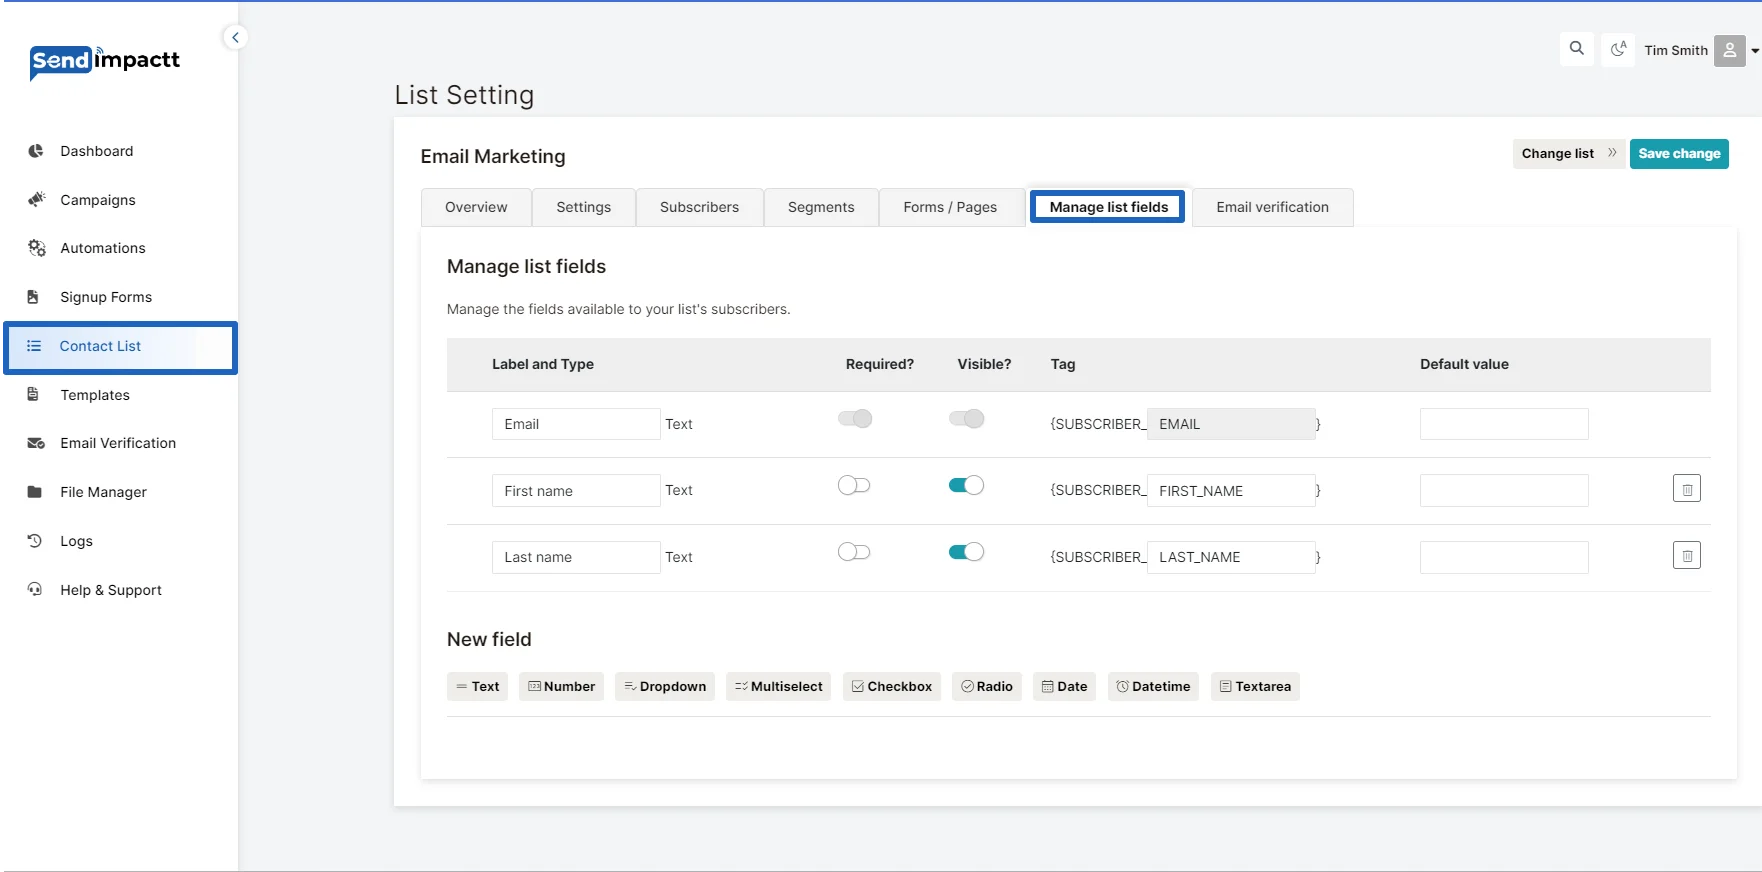
Click on Add more button:
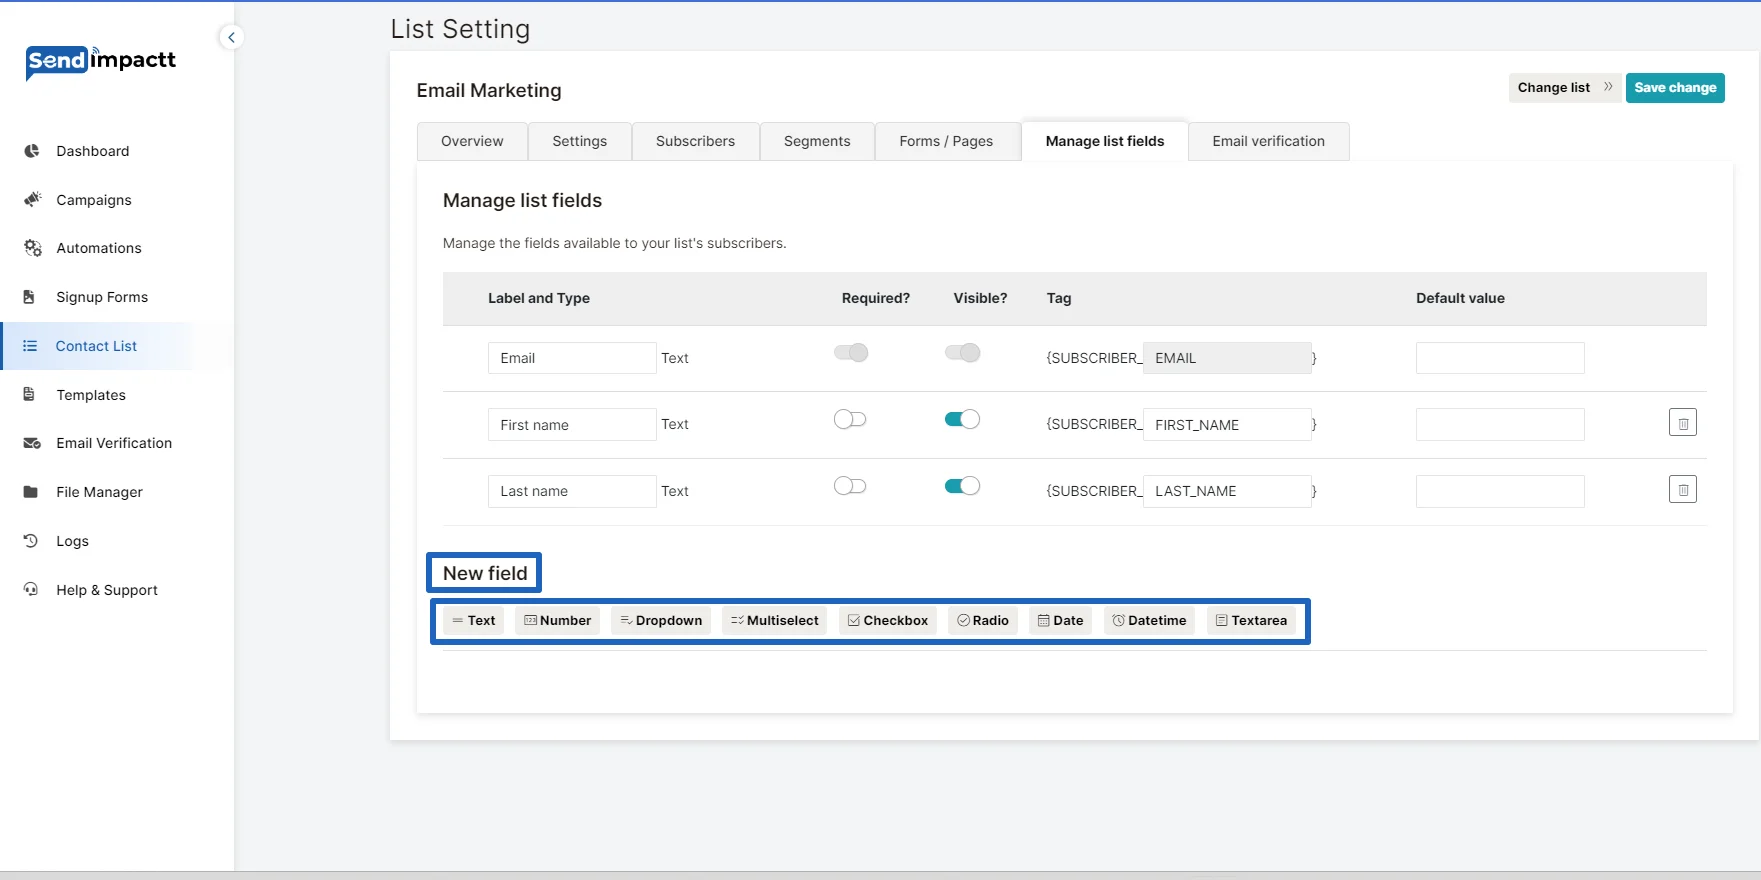
- Input the field name and select the field type from the following
- Text
- Number
- Dropdown
- Multiselect checkbox
- Radio
- Date
- Datetime
- Text area
- Click Save changes to finalize the process.
Your newly created field will be accessible on the List Fields page for future use.
Email personalization through custom fields is a powerful feature in Sendimpacttt. Each field, including custom ones, is associated with a specific tag. For instance:
- {{SUBSCRIBER_EMAIL}l} inserts the subscriber’s email address.
- {{SUBSCRIBER_LAST_NAME} inserts the subscriber’s Last name.
Leveraging personalized variables enhances the effectiveness of your campaigns. Rather than generic greetings, you can directly address each subscriber by incorporating the information they provided in custom fields.
Enhance subscriber information collection by incorporating custom fields into your forms. Follow these steps:
- Click the Edit button next to your form's title.
- Access form settings by clicking on the Email field.
- What ever fields we have in the contact list for which we are preparing form those fields will auto reflects in the Tags option.
- Choose the desired custom field and set its label based on your design preferences.