Email Campaigns
- Home
- Email Campaigns
Getting started with Email Campaigns
Create your email campaign in an easy and visual way. In this article, we will see how to create, design, and schedule your email campaign with the campaign creation flow.
- Go to Campaigns
- Click Create an email campaign.
- The Create an email campaign page opens and has two options Regular and Plain Text.
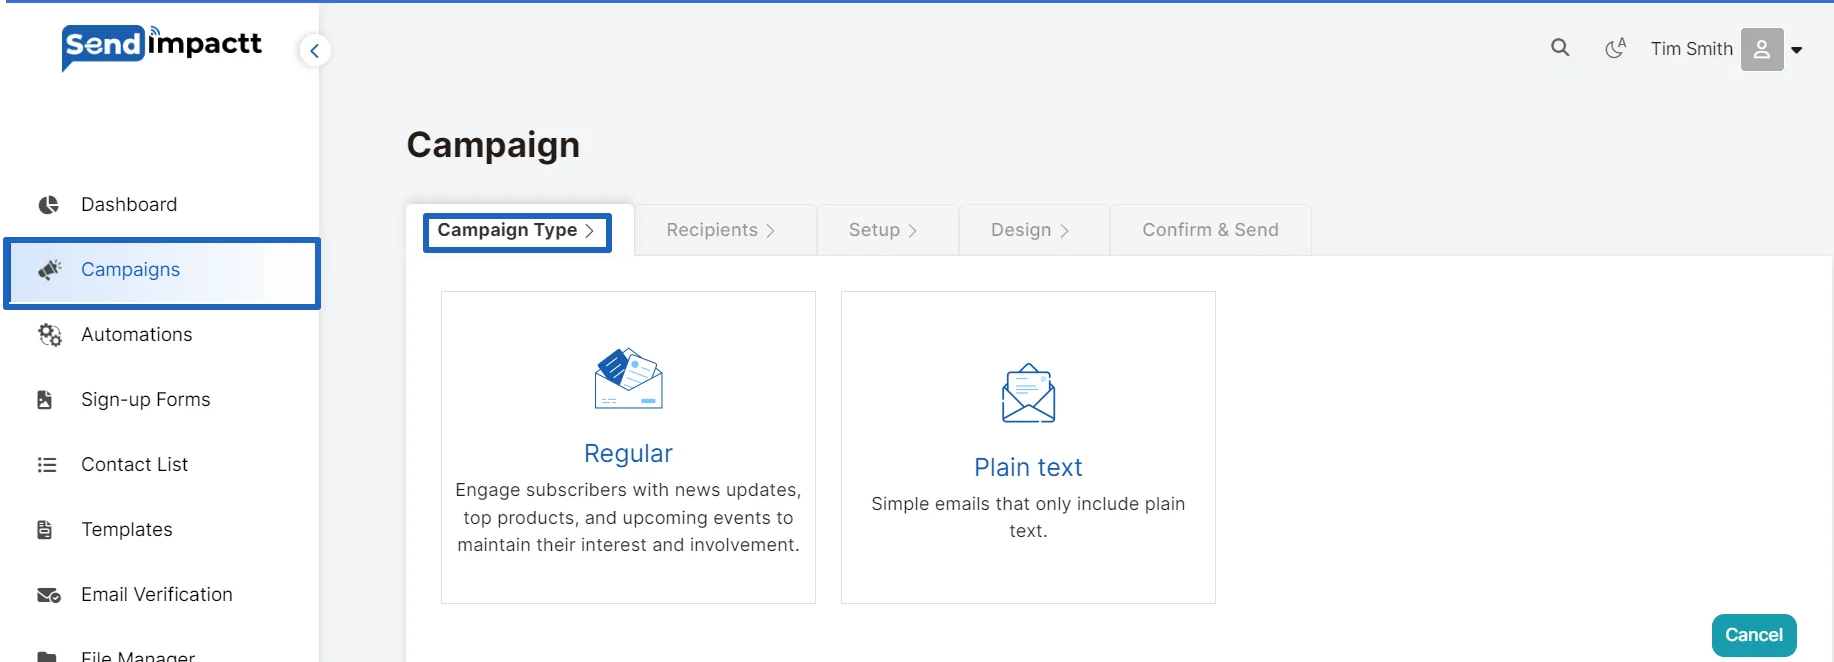
4. Choose campaign accordingly then click on next.
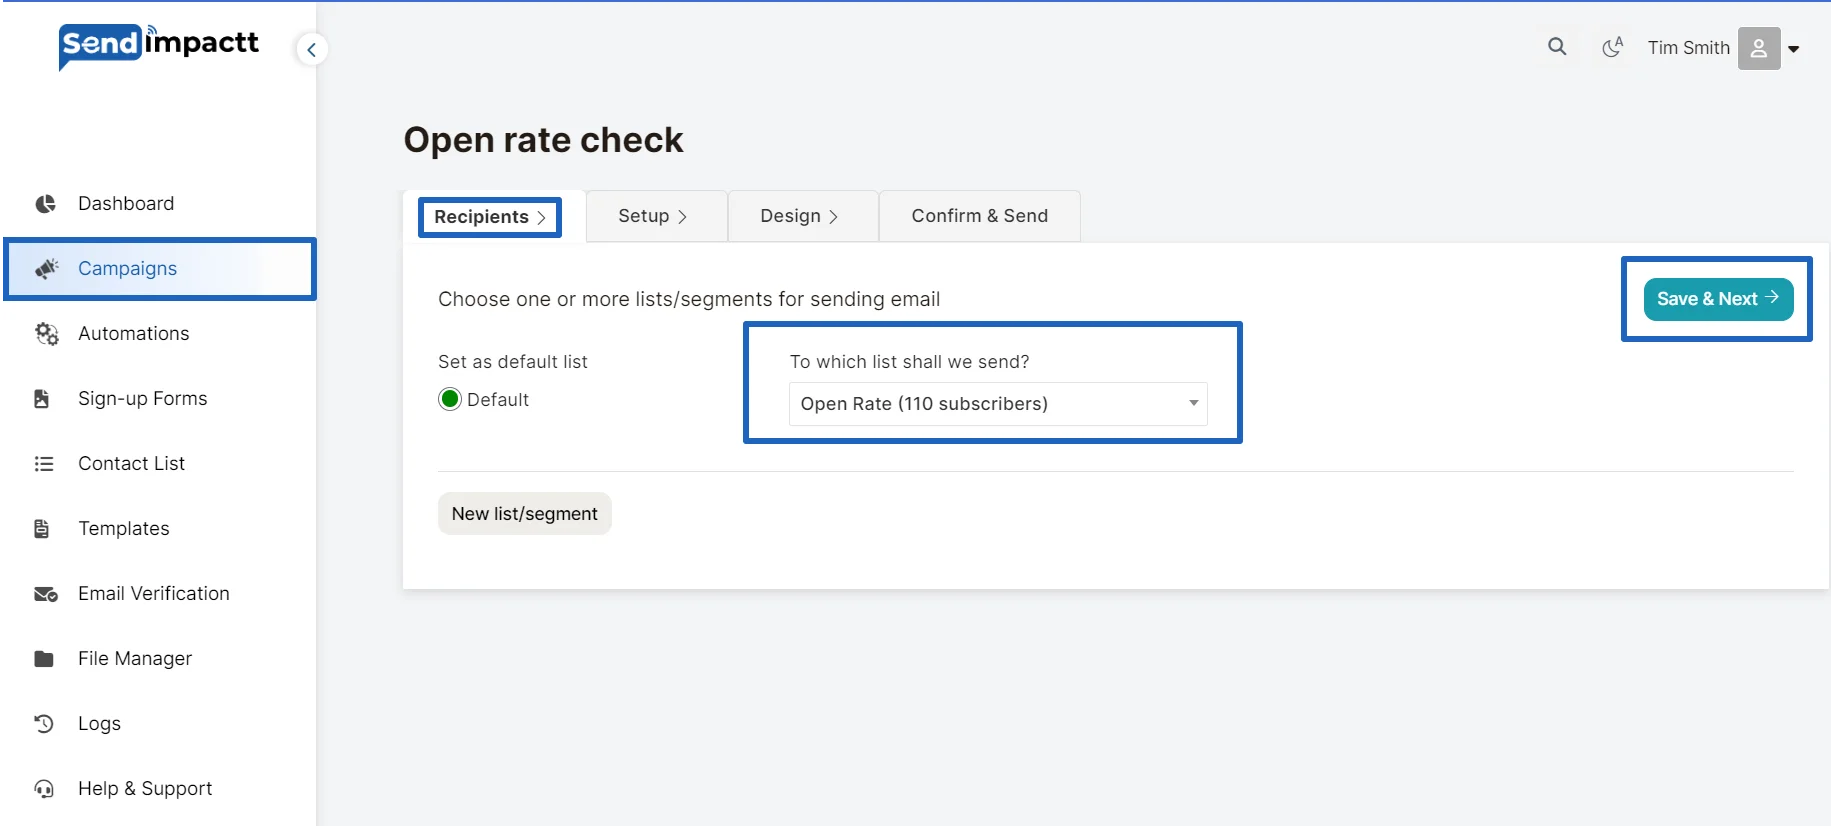
5. Choose the list/audience you want to send this campaign.
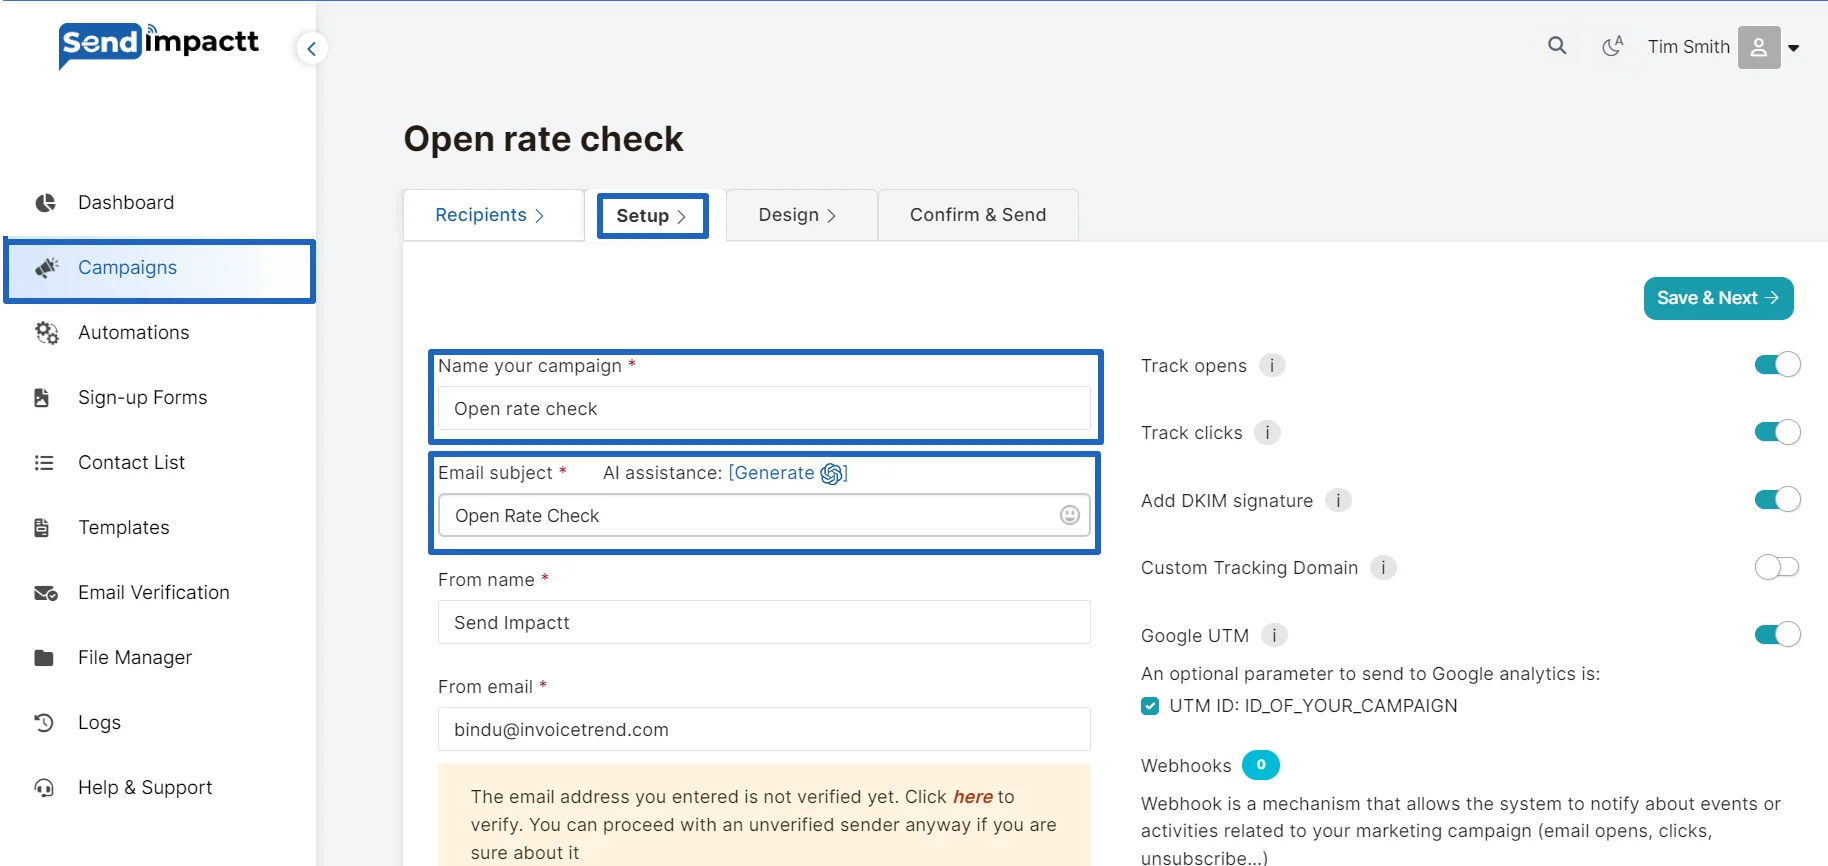
- Fill the basic setup tab and then click on next.
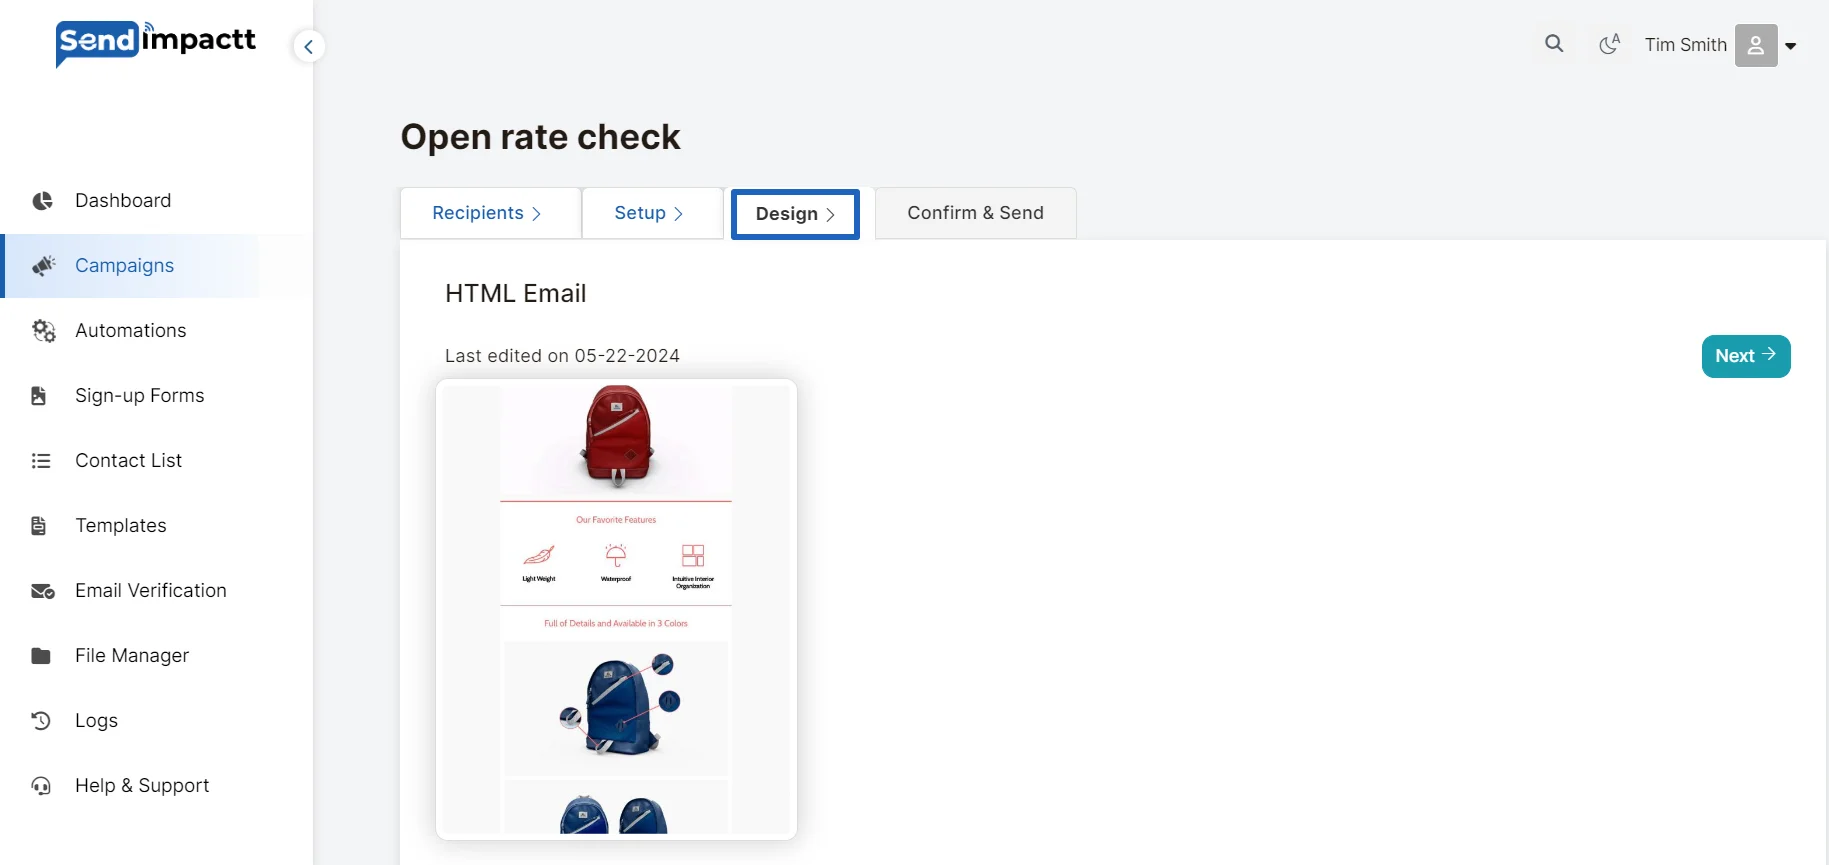
- After clicking next you will see the tab to choose the template. Edit your email according to requirement and then click next
- In this step select the time to send the email.
- In this step review and send/schedule your email campaign.
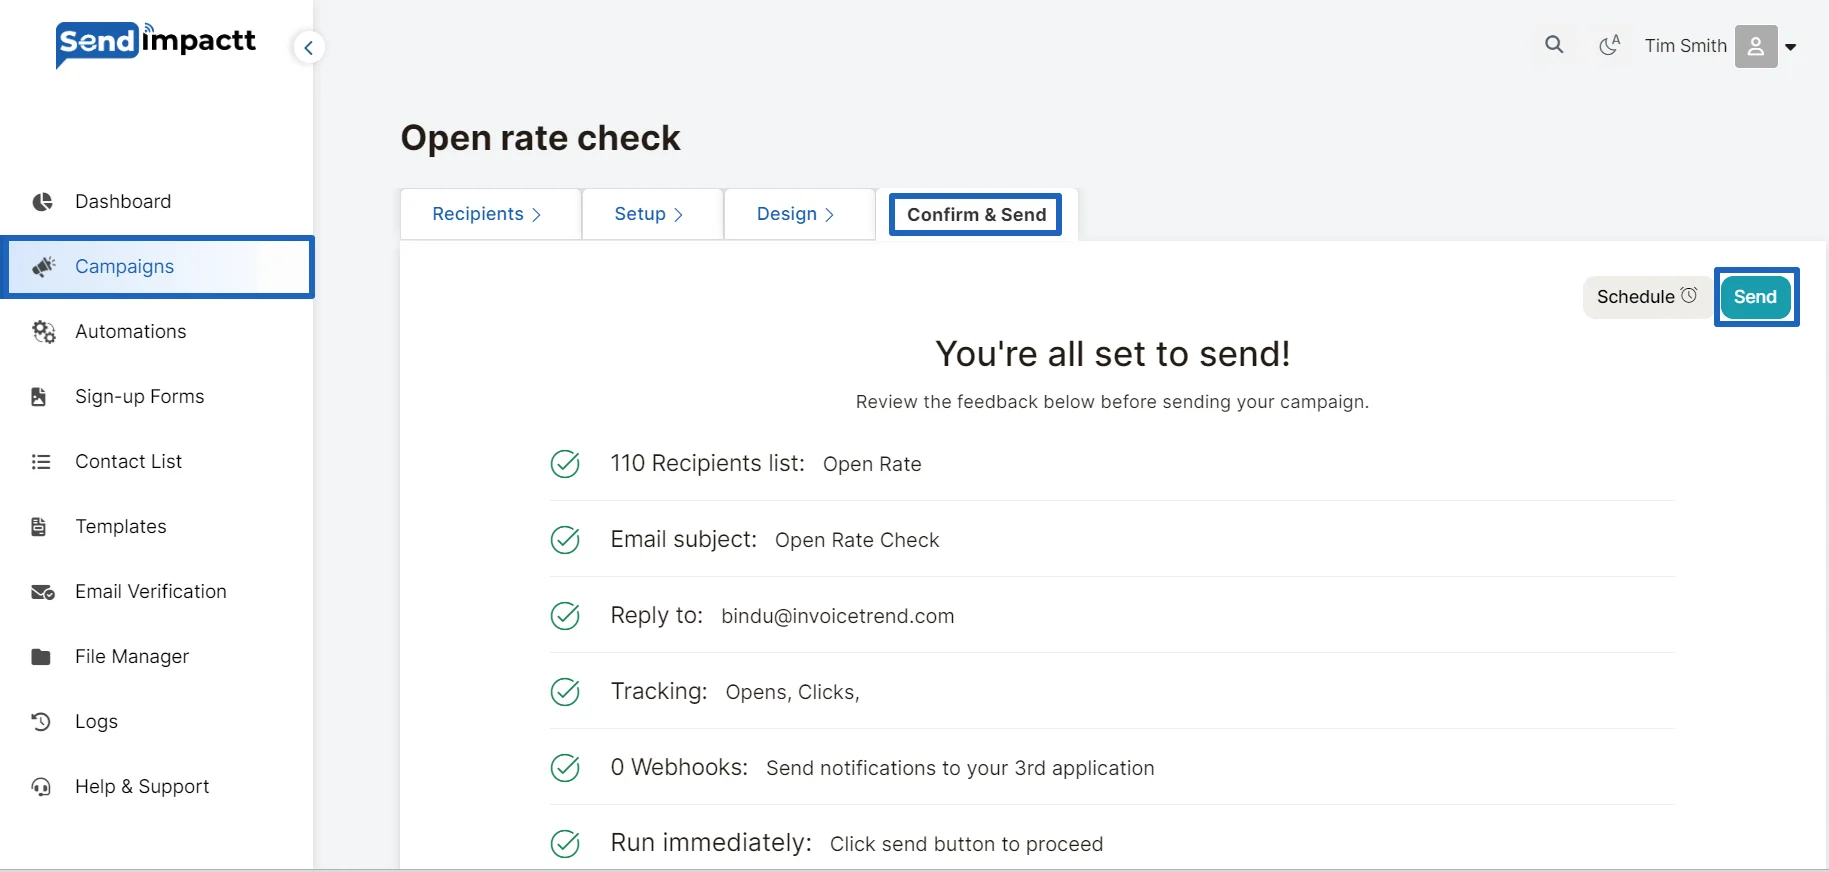
Different email programs may display HTML emails differently, so it's crucial to preview and test your email content before sending it out to your Contact List. Here's a guide on how to preview your email and send tests in Sendimpactt:
Before You Start:
Before initiating the preview and testing process, consider the following:.
- Test emails won't activate contact-specific merge tags and dynamic content. Enable live merge tag info when previewing or send a live email to a small test segment of your Contact List.
- Test emails sent from the template builder will display the from email address associated with your account.
Preview Your Email:
Preview mode provides an overview of how your email will appear in recipients' inboxes on desktop and mobile devices.
Preview in the Email Builder:
- From the email designer, click Preview.
- Choose Desktop, Mobile, or Inbox to view how your email will look.
- Toggle on Enable live merge tag info to preview merge tags.
- Close the preview when finished.
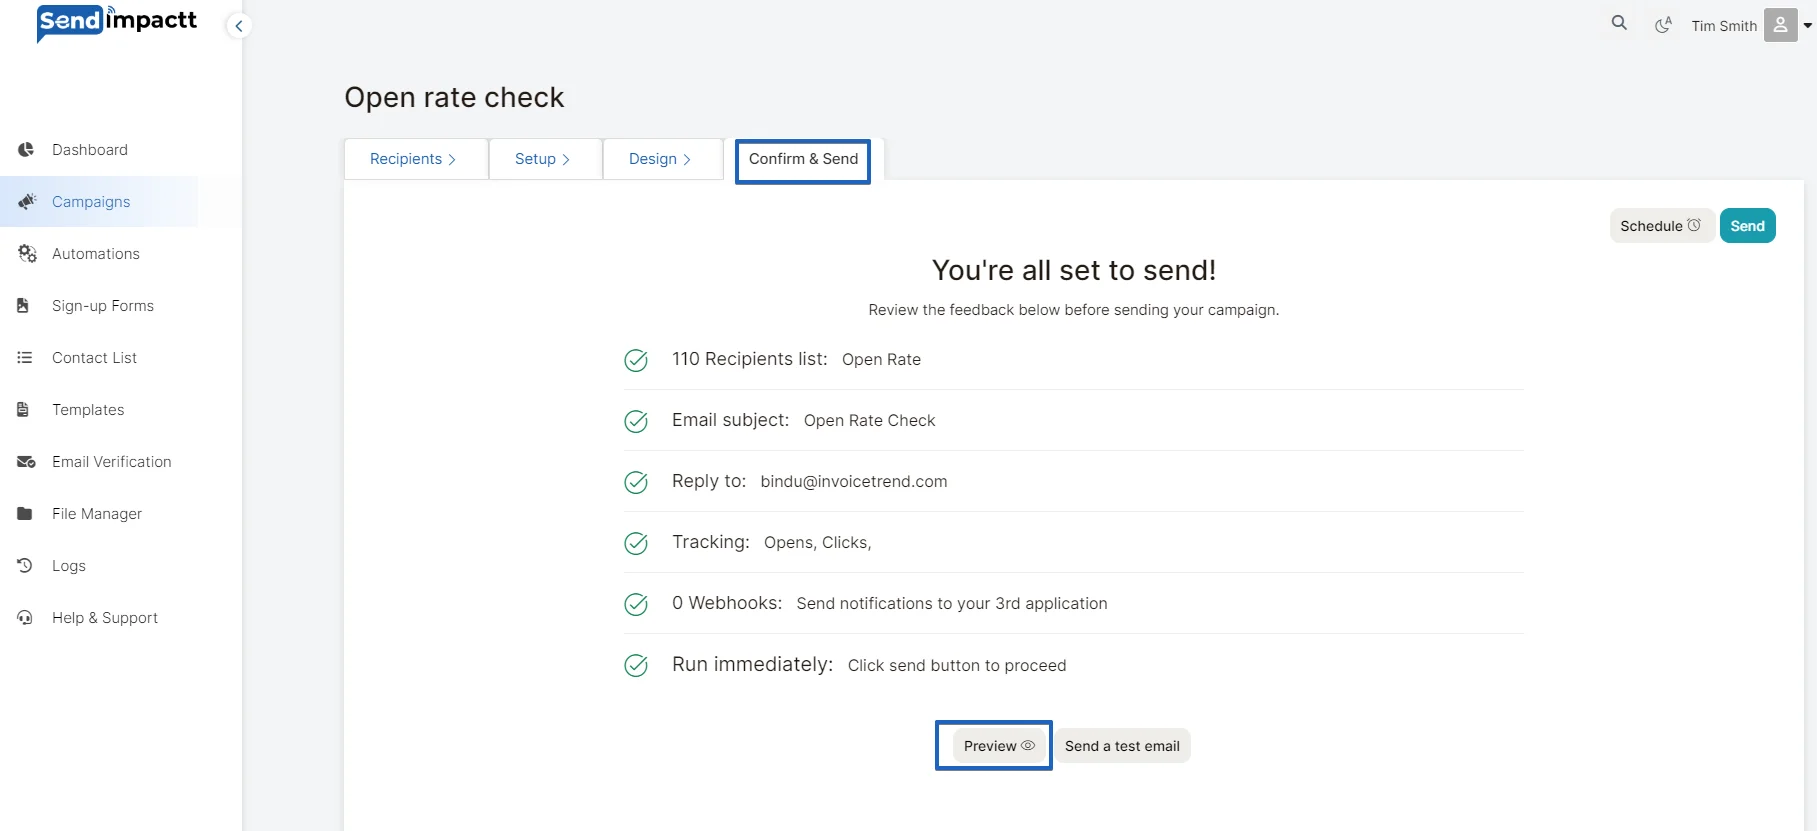
Preview email:
You will get the individual link to view as a recipient
Send a Test Email:
Send a test to see how your email will appear in your inbox or share a draft with a colleague.
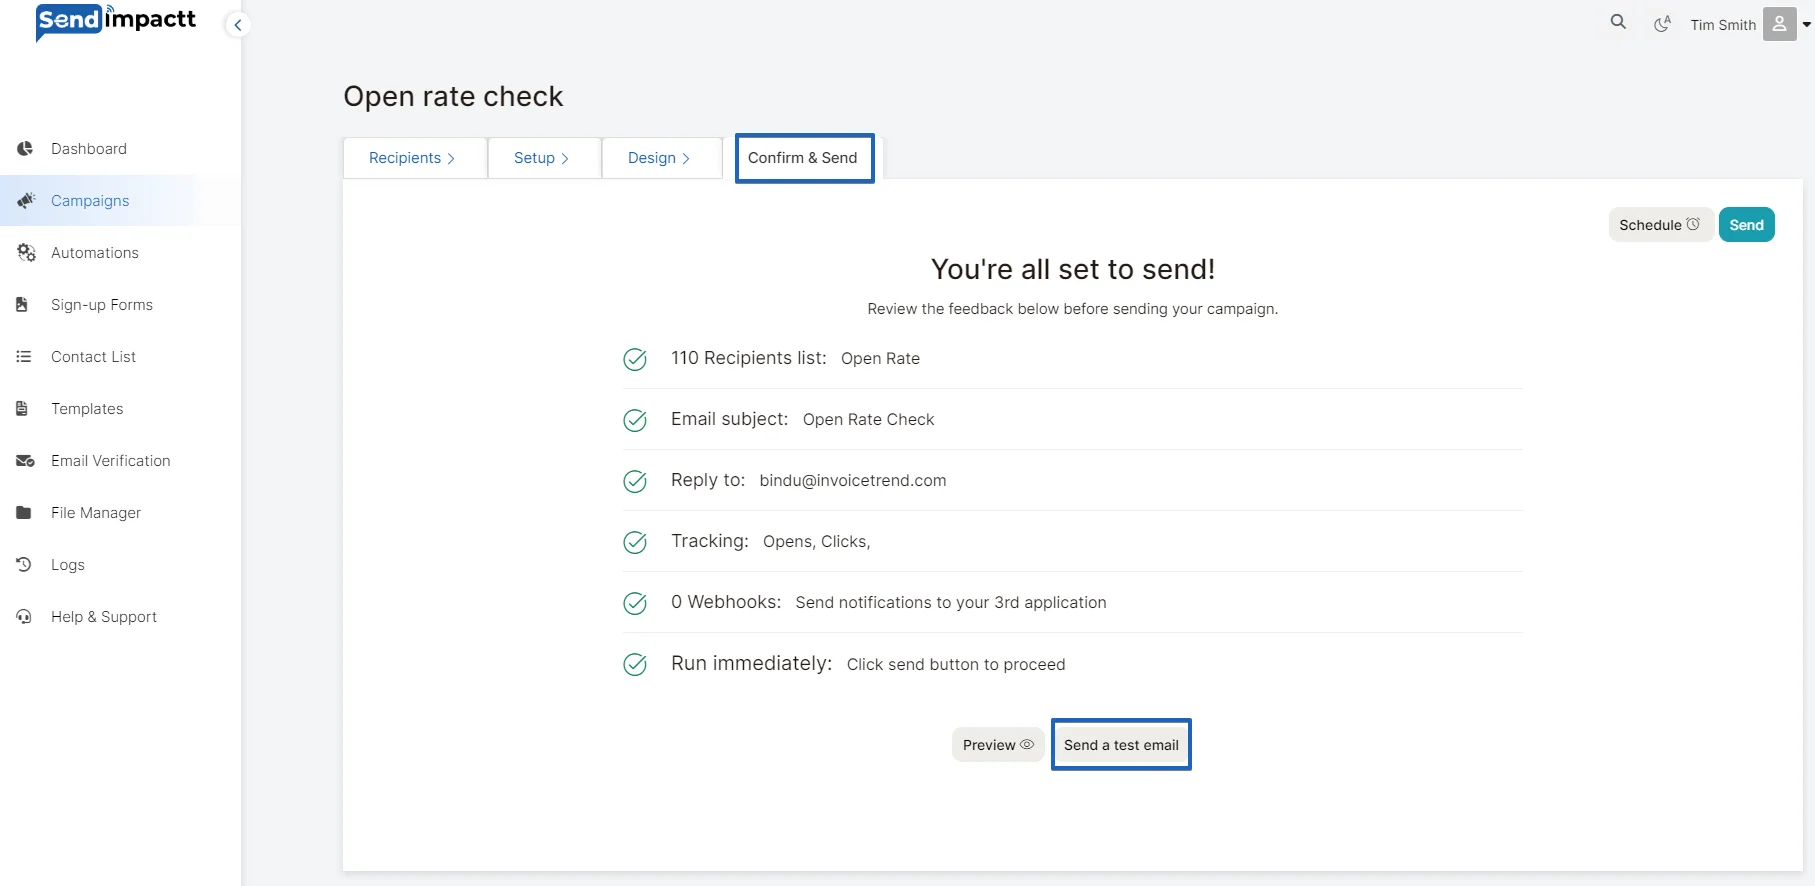
Recipients can reply to the test email with feedback, which will be sent directly to your account.
By following these steps, you can effectively preview and test your email content before sending it out to your Contact List in Sendimpactt.
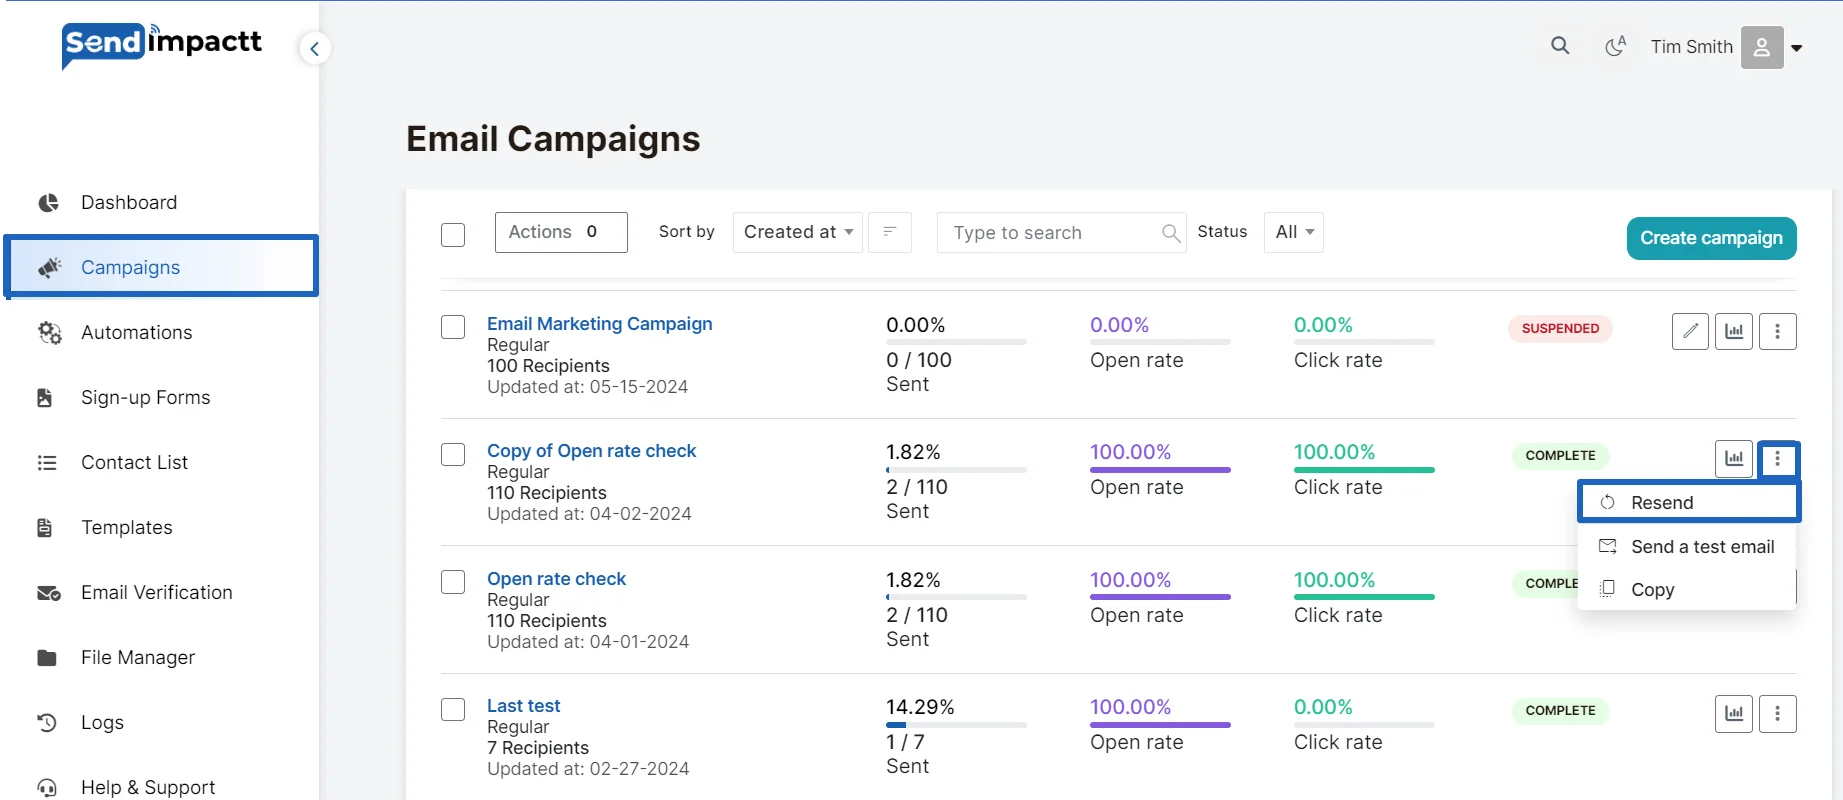
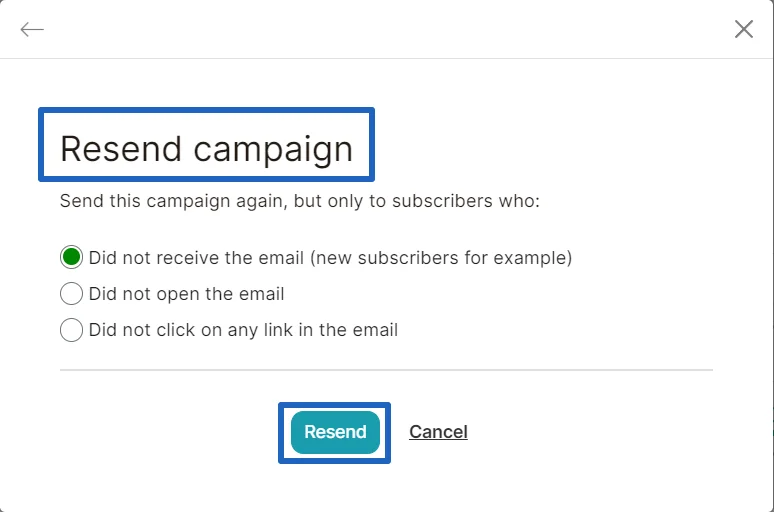
To resend the email you will get three option and can choose among them
- Did not receive the email (new subscribers for example)
- Did not open the email
- Did not click on any link in the email
 Next Steps:
After resending the campaign, monitor the Reports page to gauge its impact on engagement. Additionally, consider planning a re-engagement campaign to win back long-term inactive subscribers by identifying and re-engaging them effectively.
By implementing these strategies, you can optimize your email campaigns and improve subscriber engagement in Sendimpactt.
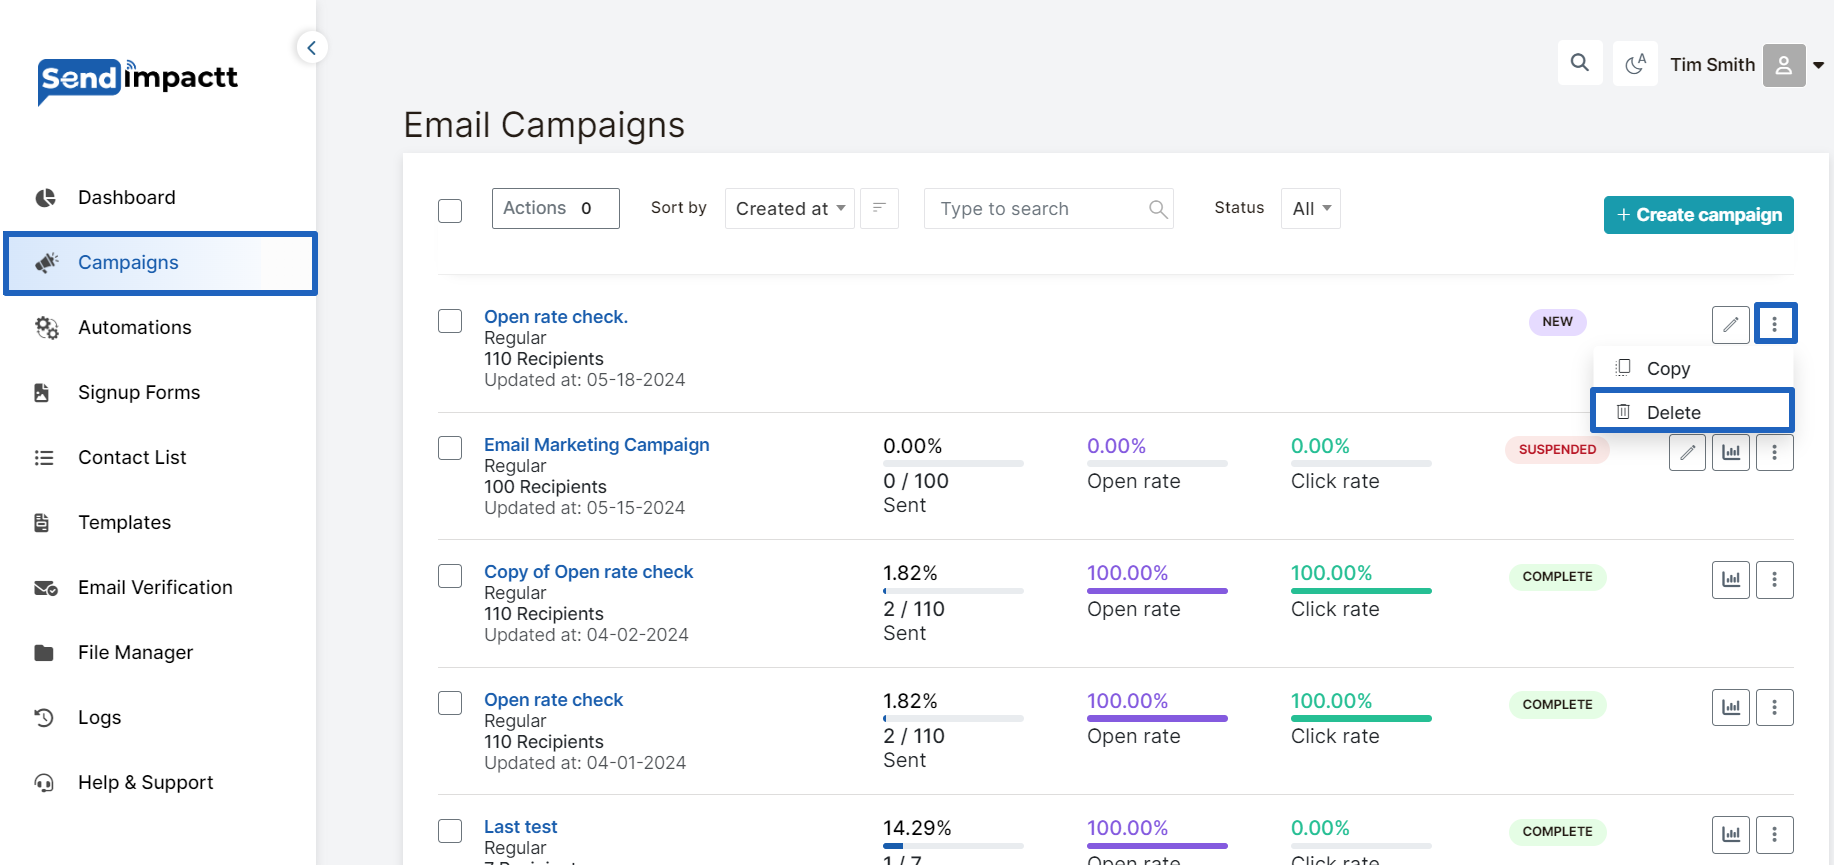
You can delete the campaign in two ways individually level or bulk level:
Individual level:
- Click on "Campaigns" in your Sendimpactt dashboard.
- Click on the three dot in the right of the campaign you want to delete
Click on delete and confirm.
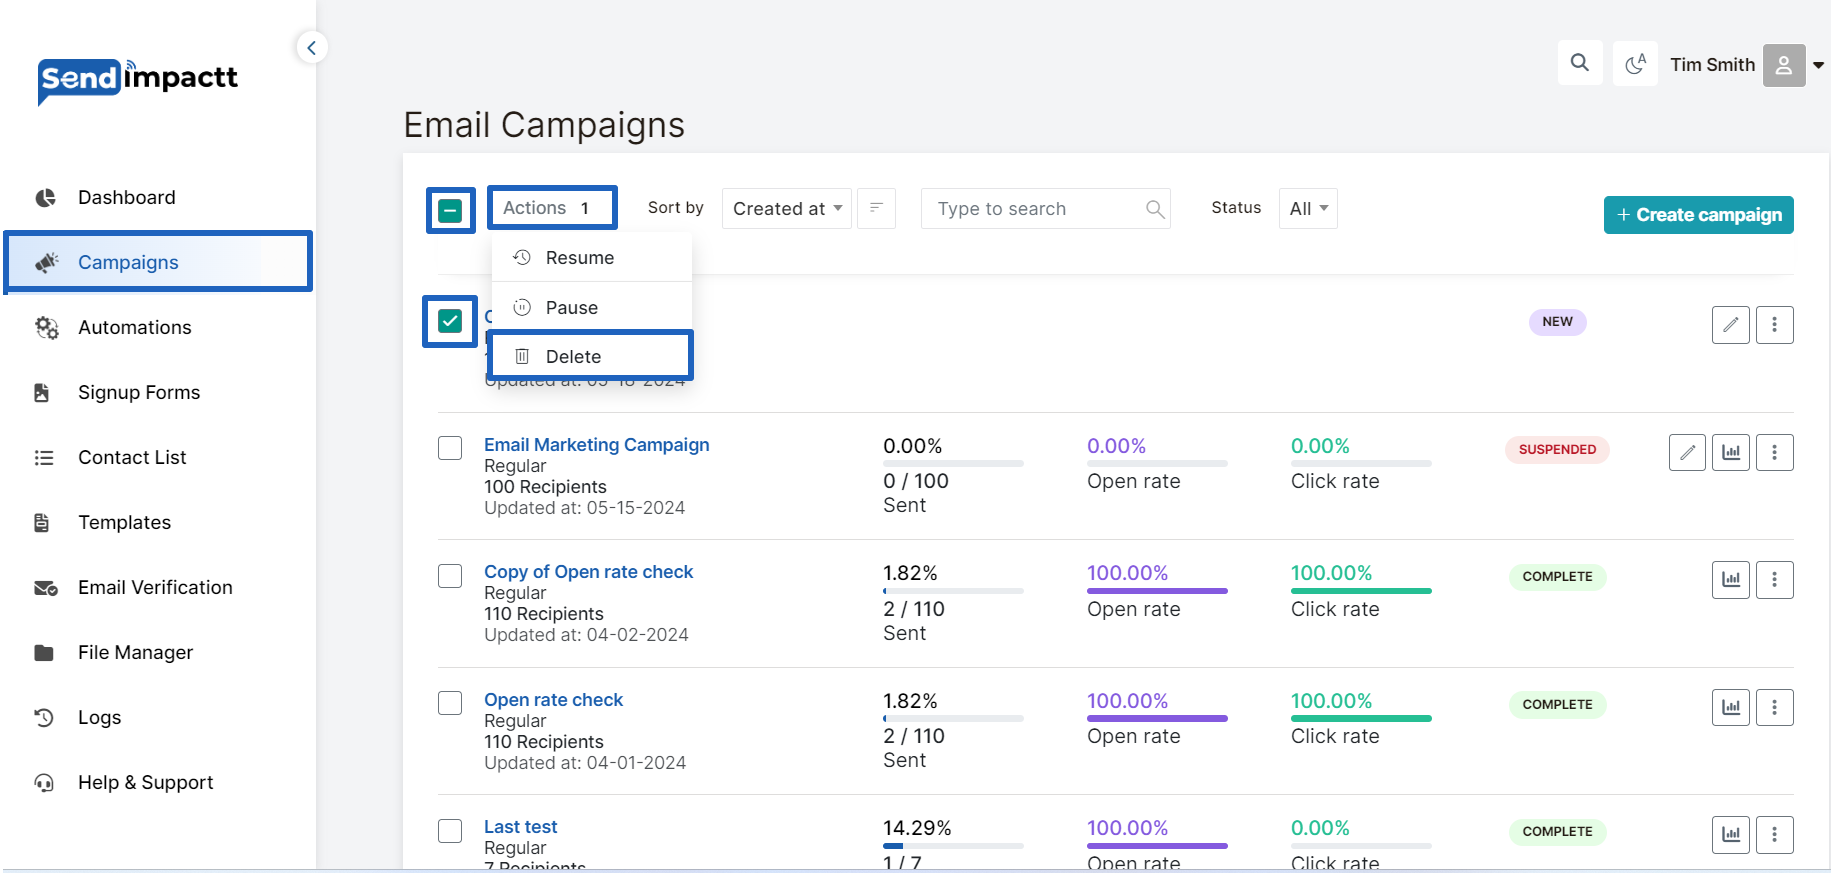
Bulk campaign delete:
Go to campaign from the dashboard
Select the bulk campaign you prefer to delete
Click on delete option and then confirm
By following these steps, you can effectively manage & delete your email campaign mail reports:
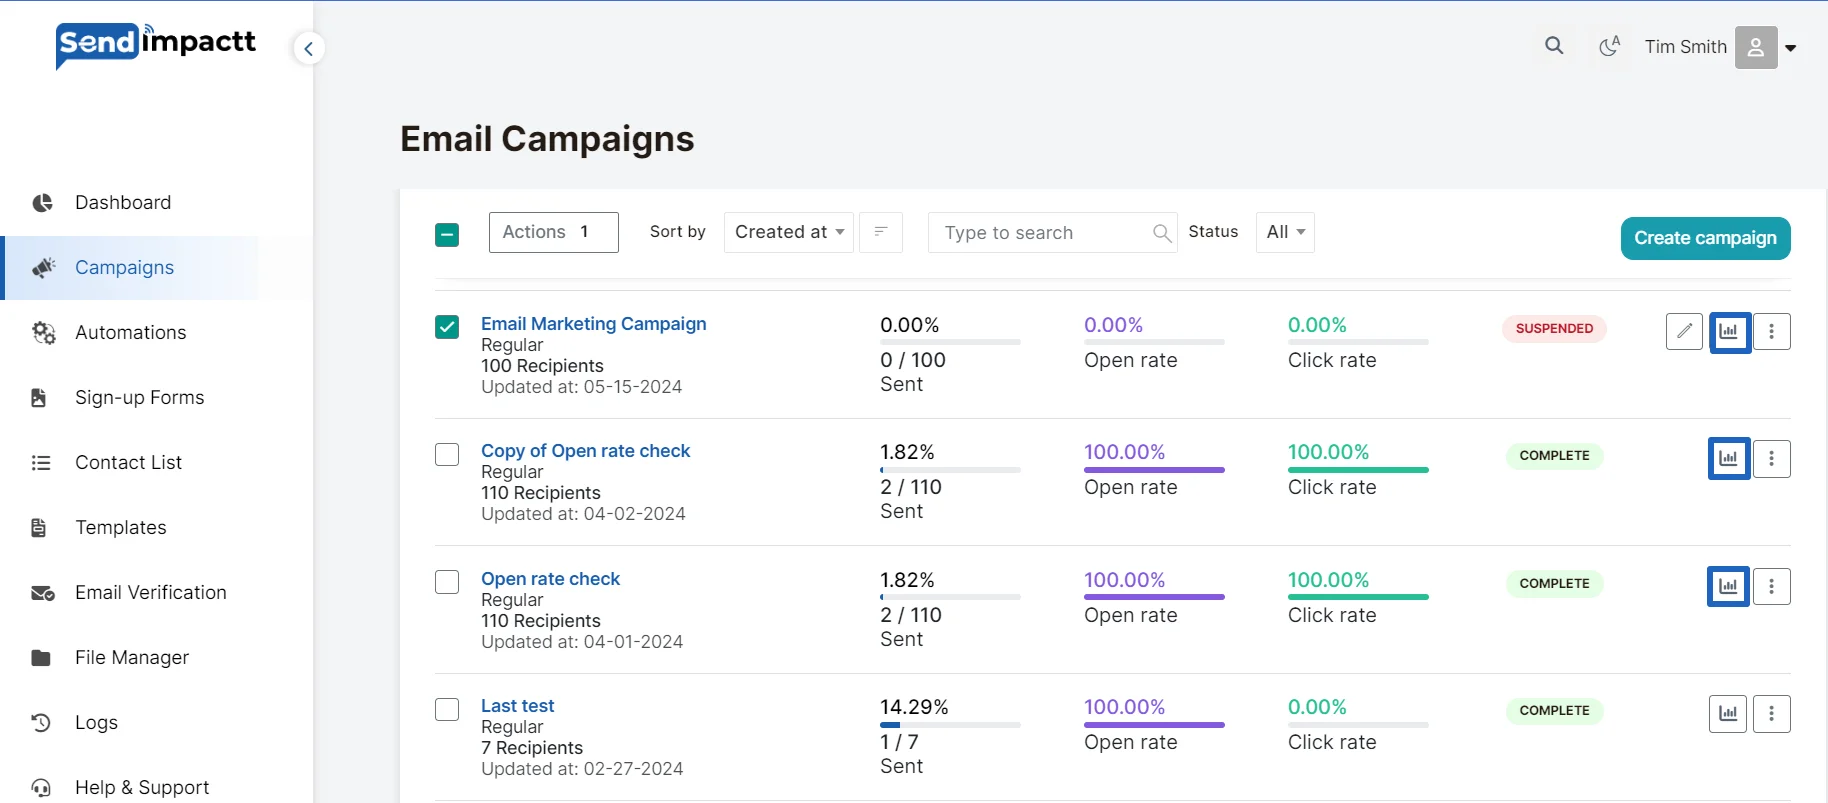
To view and understand email reports in Sendimpactt, follow these steps:
Click on relevant campaign statistics icon
- Access Reports:
- Click on "Statistics"."
- If you manage multiple Contact Lists, choose the desired Contact List from the "Current Contact List" drop-down menu.
- On the Campaigns tab, locate the specific email you want to review and click on "View Report."
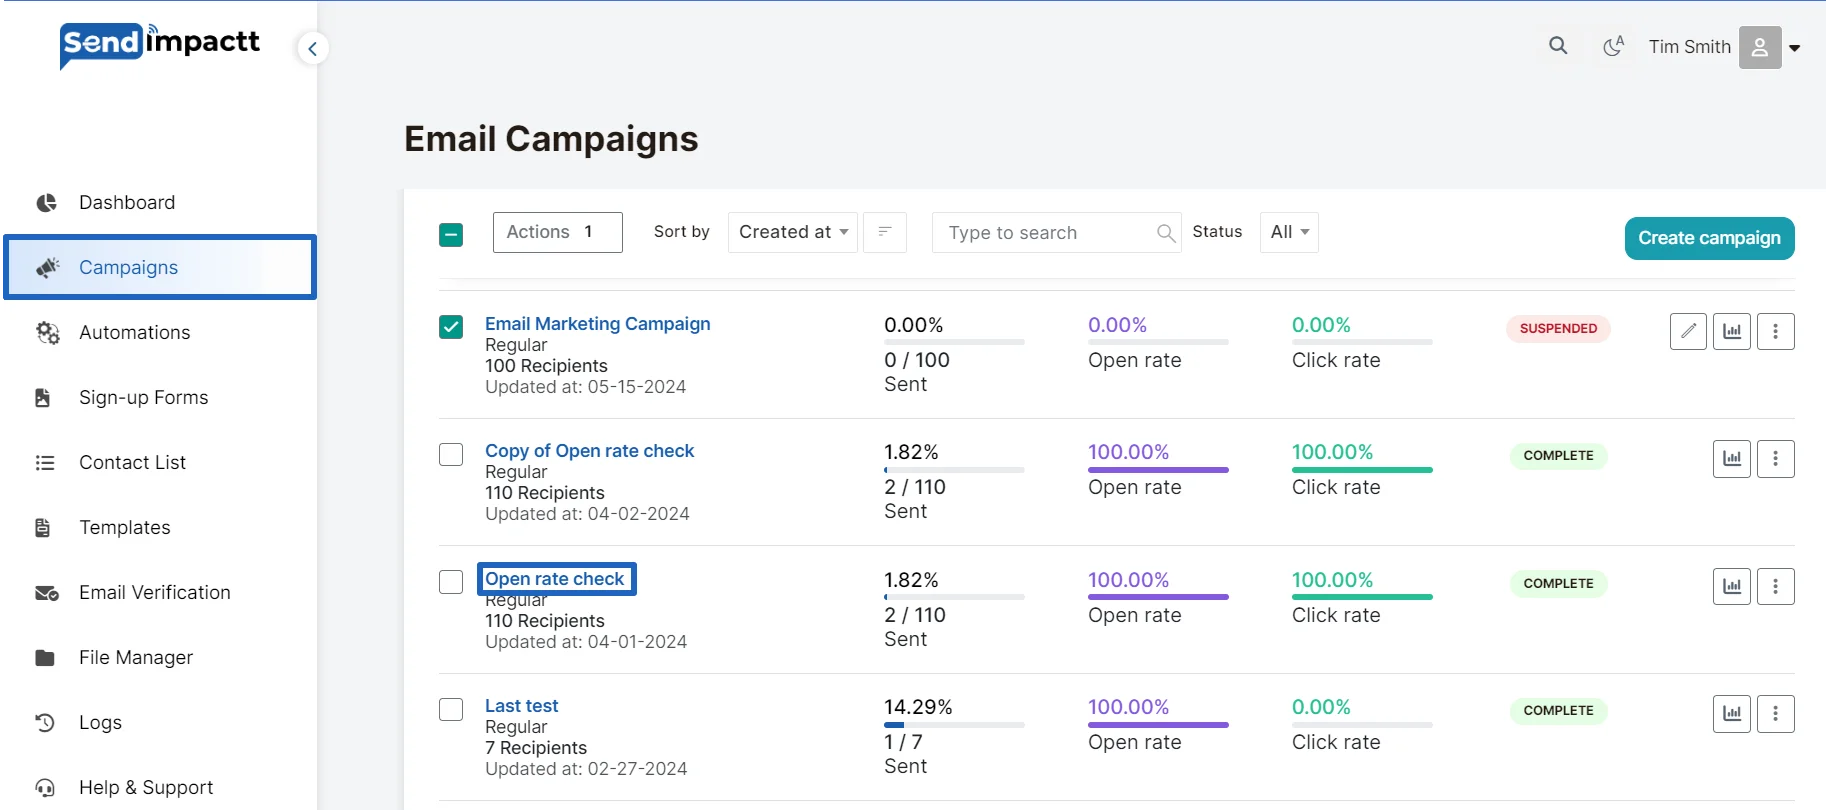
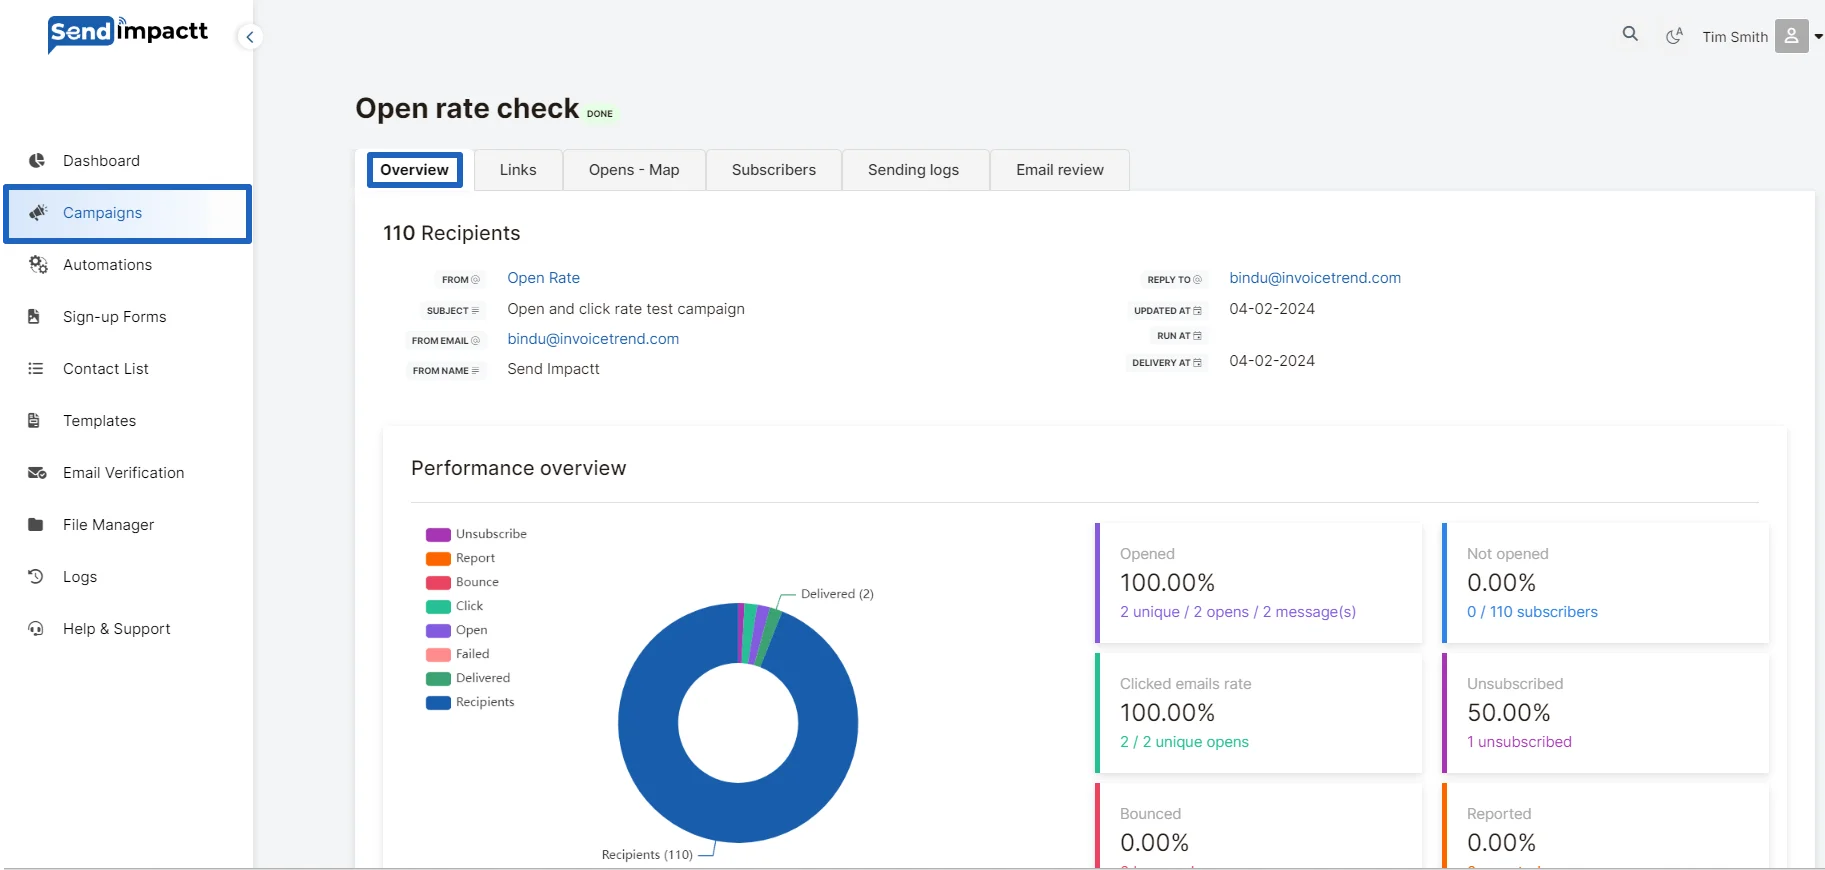
- Overview:
- The Overview section provides a summary of your email performance, including details such as recipients, Contact List, subject line, delivery time, orders generated, revenue, open rate, click rate, bounced emails, unsubscribes, total opens, total clicks, abuse reports, and more.
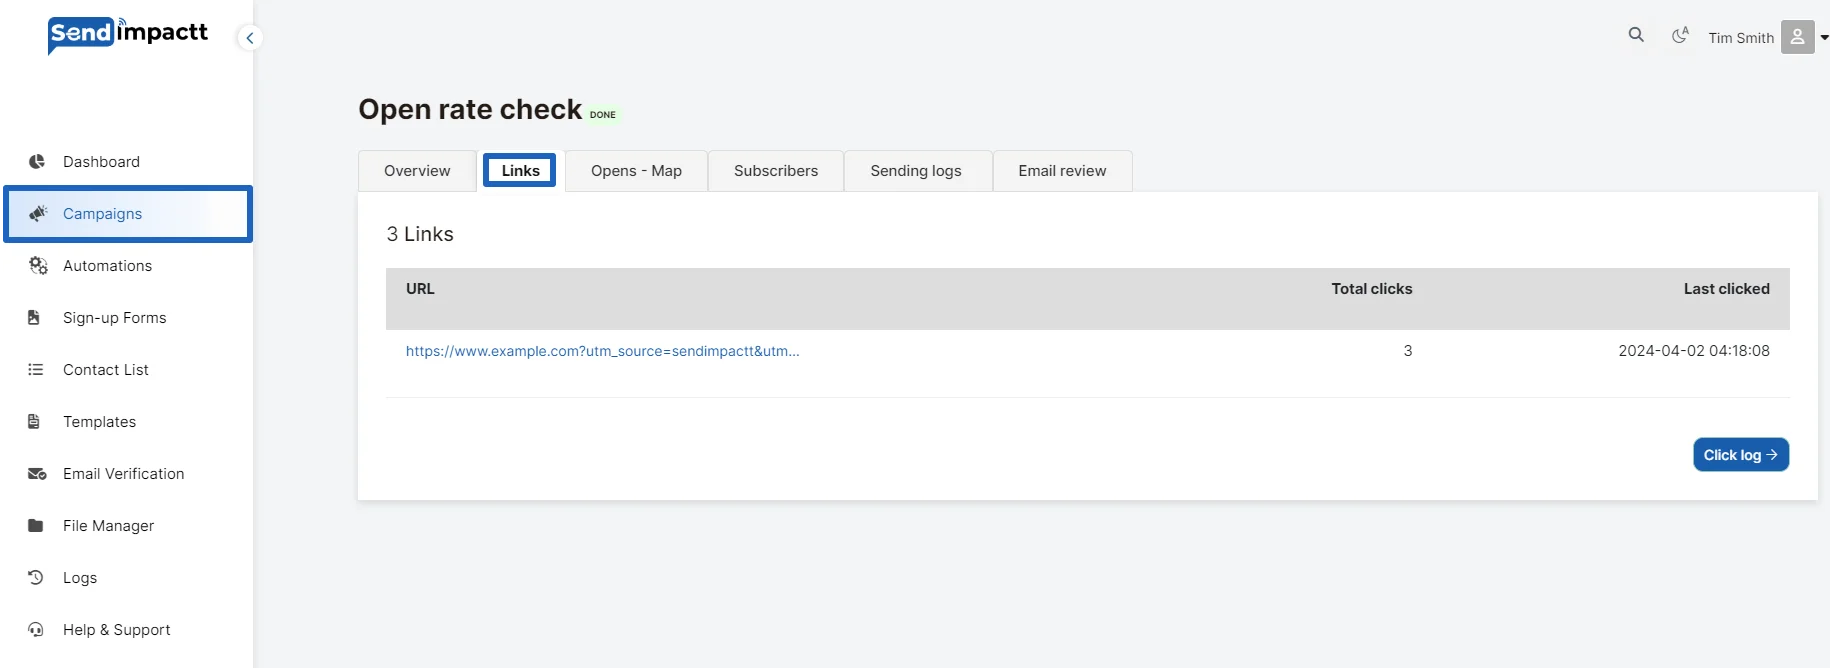
- Links performance:
- This tab offers insights into the performance of individual URLs in your email. You'll see a list of tracked URLs and the total and unique clicks for each.
- Opens Map:
Your email report features a Click Map, highlighting where recipients click on links within your content. Discover how to access and analyze this data.
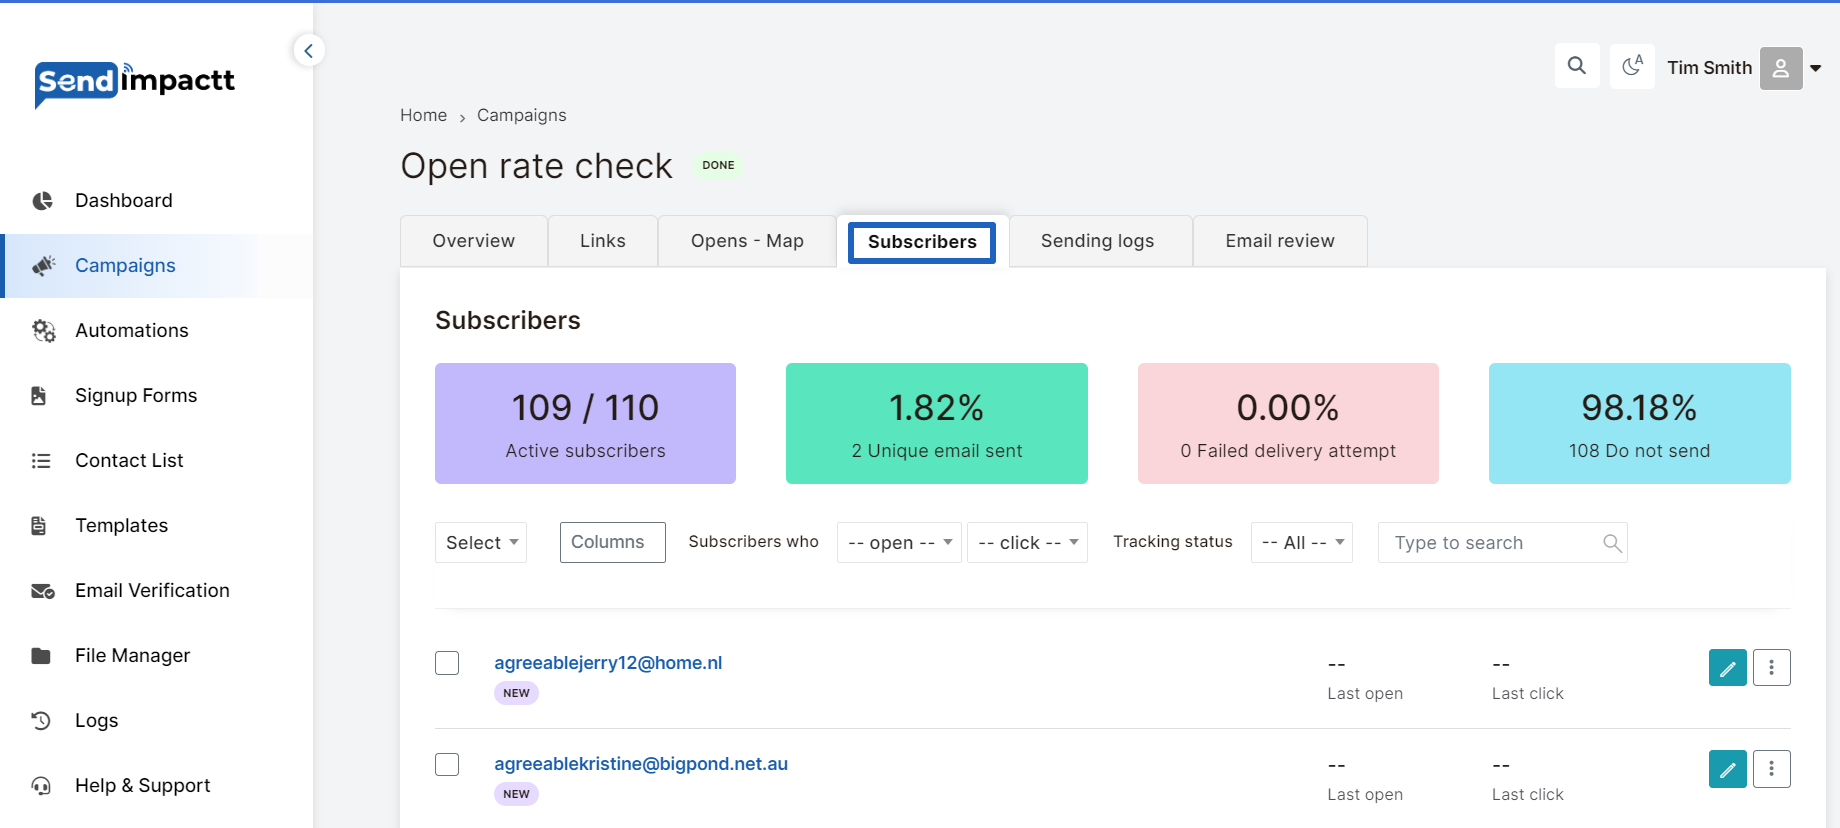
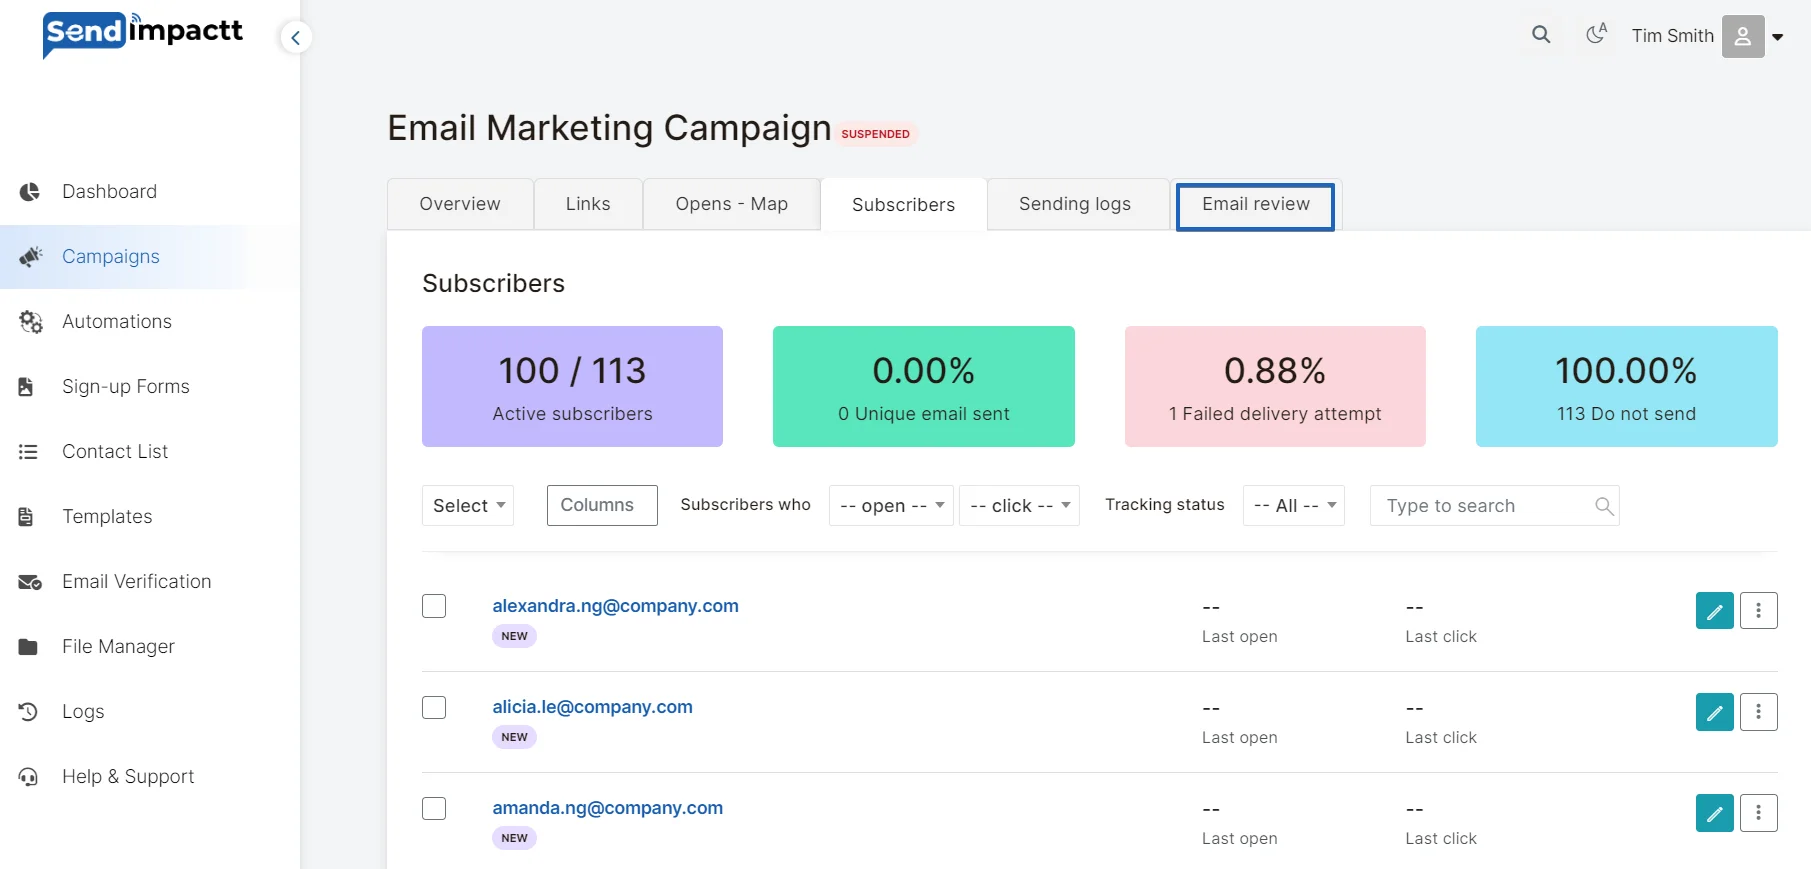
5. Subscribers:
- See the list of subscriber that shows email delivered, open rate, click rate, bounce logs
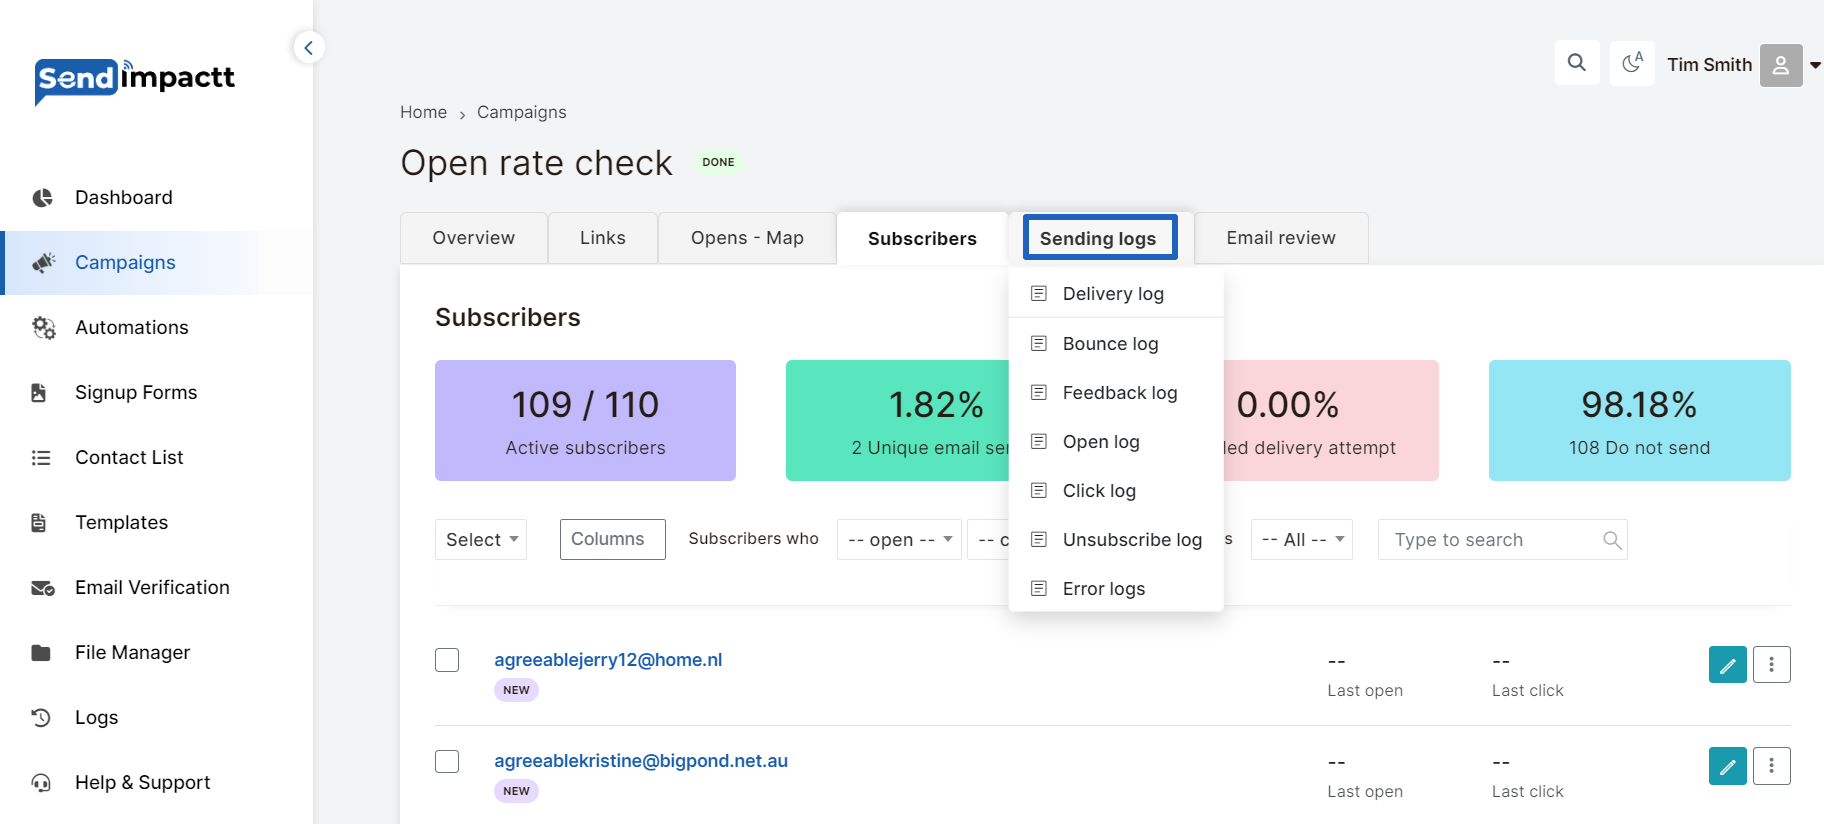
- Sending Logs:
- Types of Logs: Bounce, Open, Click, etc.
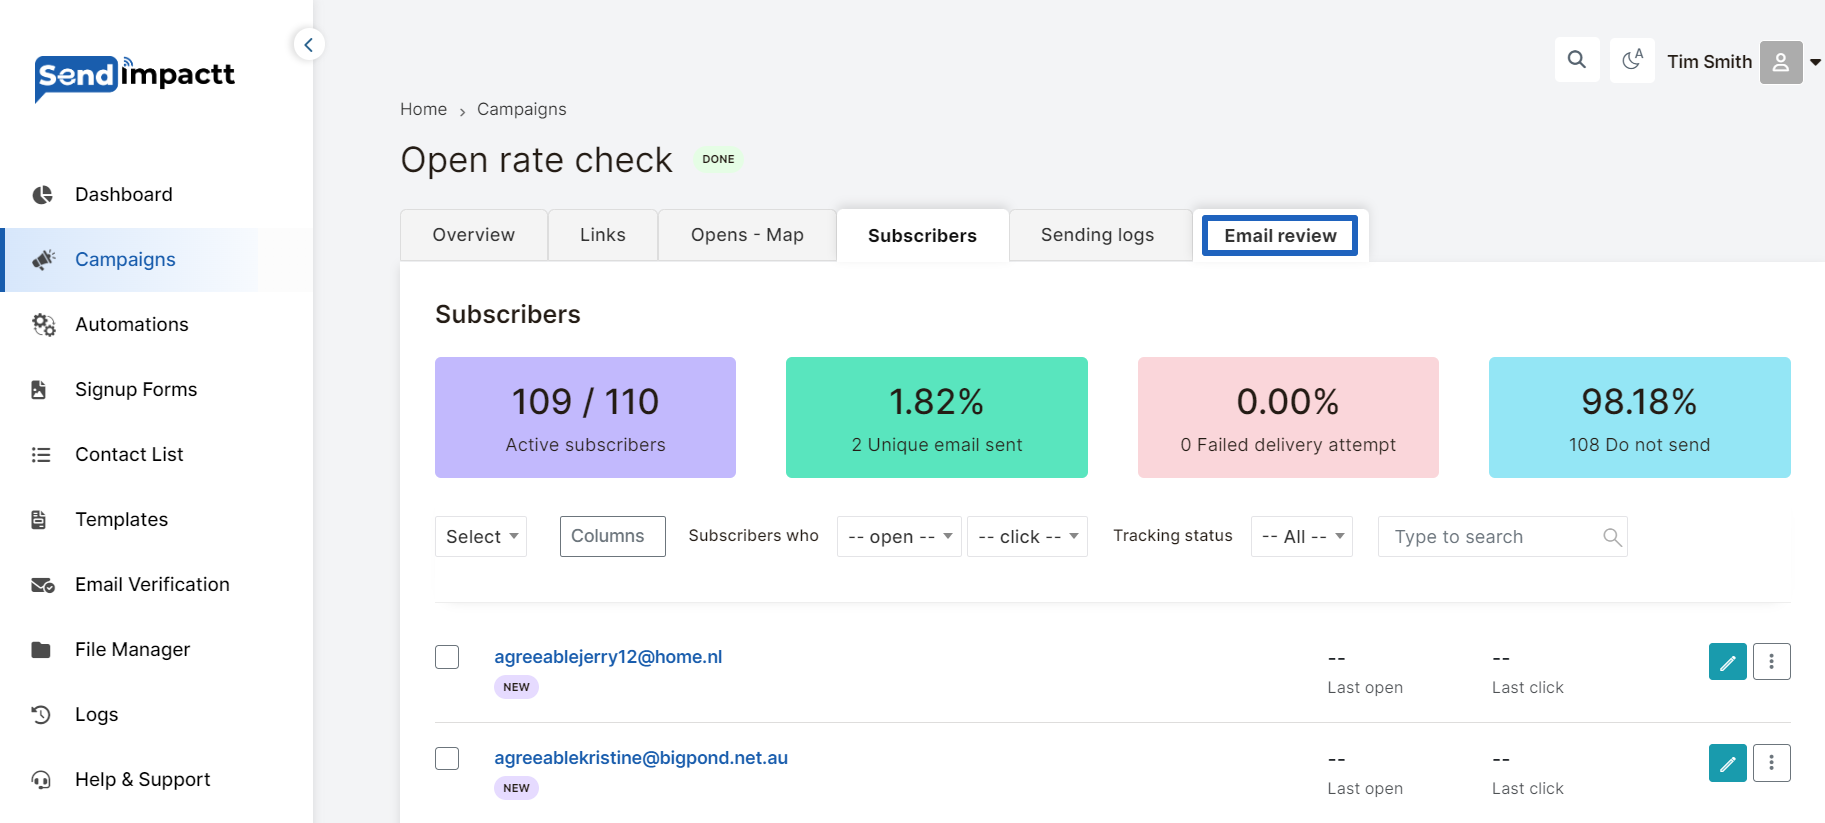
- Email Review:
- Review the email sent to the contact list

In Sendimpactt, if you delete the unsubscribe link from your email campaign, it will be automatically added back during the sending process. This ensures compliance with email marketing regulations and provides recipients with the option to unsubscribe from your emails if they choose to do so.
However, it's not recommended to delete the unsubscribe link provided by Sendimpactt. The default unsubscribe link may not lead to an unsubscribe page in your recipients' preferred language, and it may not match your branding. Instead, it's highly recommended to add your own unsubscribe link to your email campaigns and use custom unsubscribe pages.
By adding a custom unsubscribe link and page, you can ensure that the unsubscribe process is user-friendly, matches your brand's identity, and complies with legal requirements. This approach helps maintain a positive relationship with your subscribers by providing them with a seamless and personalized experience when managing their email preferences.
Design an Email with the Editor:
Use our Editor to design a marketing email to sell products, promote your brand, boost Contact List engagement, and more. Arrange drag-and-drop content blocks to quickly get the look you need, or code your own template from scratch.
In this article, you'll learn the basics to design an email with the classic builder in Sendimpactt.
When you create a email in Sendimpactt, you'll choose a template in the Content section of the campaign builder. The template you select will be the foundation of your design.
Example- campaign builder-select a template
Here are the different template categories and what they include:
Themes
We teamed up with some of the most talented designers on the web to bring you beautiful predesigned templates that are simple to use.
Saved templates
This tab includes templates you uploaded on the Templates page of your account, and any email designs that you saved as templates for future use. Select a Saved template, and edit the content and design how you want.
- Campaigns: Choose one of your recently sent or draft email campaigns as the starting point for a new campaign. We'll create an exact copy of the email's content and design, so you can edit it as needed without starting over from scratch.
- Code your own: If you have a custom-coded template, click Code your own to paste in your code, import it from a ZIP file, or import it from a URL. Include our template language in your code to edit the design of the template with our campaign builder.
- Add your content: After you choose a template, you'll move on to the design step. Use content blocks to add and format text, upload images, link to files, and more.
All templates show placeholder text and images to help you begin to design your email. Depending on the template you choose, you can add, delete, move, and replicate content blocks to create the look and feel you want.
The drag and drop editor has the following options:
- Design
- Change template
- Preview
- Design mode : design and source code
On the right side you will have a widgets, tags and settings
You can drag and drop the required things and click on save & assign the category to the template.
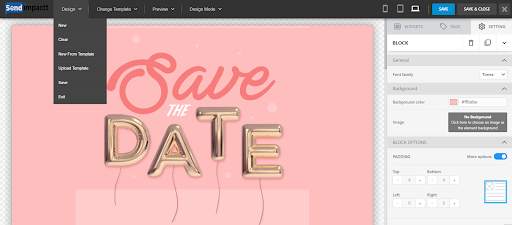
Drag and drop content blocks
Our drag-and-drop editor allows you to duplicate, delete, and rearrange content blocks on the fly. Drag and drop a variety of content blocks into your layout and rearrange them to customize the look and feel of your email.
Add text
The best way to add text to your email is to type it directly into the content block editing pane. If you prefer to work outside of the campaign builder, copy and paste your content from a simple text editor, like Notepad.
Avoid rich-text word-processing programs, like Word or Publisher. They add styling code to the text that can prevent your ability to style content in the campaign builder. If you want to copy content from a rich-text editor, website, or email program, click the Paste as plain text icon on the editor toolbar to add your text.
If content has already been added to your email and you didn't use the Paste as plain text option, or if content doesn't update when you apply styling to your text, click Clear Styles and try again.
Clear styles:
Clear styles to remove any conflicting formatting or styles that were brought in when you added content. This only removes the formatting that's been applied to your text and does not remove the text itself.
To clear styles from your content, follow these steps:
Click the Text content block you want to edit.
In the Content tab, highlight the text you want to change.
In the editor toolbar, click Clear Styles.
Edit styles
Styles and settings for your campaign design can be applied from a few different places. Each section in your email campaign is related to another in a hierarchy, so the styles you set in one area of the campaign builder may affect other sections.
Section Style tab
Every template is divided into different sections, like the header, body, and footer. Apply styles to these sections on the Style tab in the campaign builder. When styles are applied to a section, they are also applied to all content blocks in that section.
Content block Style and Settings tabs
If you want one of your content blocks to have different styling from other content blocks in its section, open that content block and set preferences on the Style and Settings tabs for that content block. Styles you apply here will override the style for the section that content block is in.
Editor toolbar
Use the editor toolbar in each content block to fine-tune the styling on a line-by-line basis. Changes you make here will override any styles you've set for that content block or section.
The unsubscribe link is a link that recipients can click from the footer of your email to open your Sendimpactt unsubscribe page and stop receiving your emails. Having an unsubscribe link in your campaigns is mandatory as it is essential to your contacts and for the proper functioning of your campaigns. The process of inserting an unsubscribe link in your email campaigns is in two steps: you first need to add the unsubscribe link in your campaign design and then select which unsubscribe page it will lead to.
FAQs – Email campaigns
Understanding why emails often land in Gmail’s Promotions tab is crucial for email marketers. In this article, we’ll dissect the complex algorithms governing Gmail’s inbox tabs and provide actionable strategies to enhance email deliverability to the coveted Primary tab.
The Dynamics of Gmail’s Inbox Tabs:
Gmail’s intricate algorithms consider sender details, recipient engagement, and email content when categorizing emails. Marketing and promotional emails typically find their way to the Promotions tab, but it’s essential to note that this isn’t equivalent to the dreaded spam folder. Emails in the Promotions tab can still thrive, positively impacting deliverability, open rates, and reducing spam complaints.
Benefits of the Promotions Tab:
Contrary to common belief, the Promotions tab offers opportunities for engagement. Improved deliverability, increased open rates, and reduced spam complaints are among the advantages. A detailed performance breakdown following Gmail’s inbox tab introduction can be explored for deeper insights.
Strategies for Landing in the Primary Tab:
While Gmail’s algorithms control email placement, there are proactive steps you can take:
- Encourage Contacts to Add Your Email to Contacts:
Requesting contacts to add your email to their Gmail Contacts ensures direct delivery to their Primary tab. - Empower Contacts to Move Emails:
Contacts can manually move emails from the Promotions tab to the Primary tab, prompting Gmail to inquire about future preferences.
Optimizing Email Content:
Keeping emails simple is pivotal for Primary tab placement:
- Limit Links and Images:
Restricting external links and minimizing images helps avoid promotional categorization. - Light Styling and Formatting:
Simplify formatting by avoiding excessive div blocks, font variations, and complex styling options for a more conversational feel. - Steer Clear of Promotional Language:
Gmail flags promotional language, so ditch excessive punctuation and caps. Save promotional language for website content. - Personalize Your Emails:
Addressing recipients by name and adopting a friendly tone contributes to a more personalized, less promotional appearance. - Use a Single Personal Email Address:
Opt for a personal email address over generic or business ones to establish a friendlier connection. - Authenticate Your Domain:
Send emails from a personalized domain to enhance deliverability. Authenticating your domain aligns the sender’s identity with the perceived sender, reinforcing trust.
Email marketing effectiveness hinges on delivering content seamlessly, but Gmail’s clipping can disrupt this flow. In this article, we delve into the reasons behind Gmail clipping and provide practical strategies to prevent it.
Understanding Gmail Clipping:
When Gmail clips an email, it truncates content and hides it behind a “View entire message” link, impacting user experience and potentially distorting data in campaign reports. Clipping can affect deliverability and lead to unintended consequences, such as contacts marking emails as spam.
Factors Contributing to Gmail Clipping:
File Size Matters:
Gmail automatically clips emails exceeding 102KB. Understanding that each element in an email, including text, hyperlinks, and images, contributes to the message size is crucial. Minimizing unnecessary content is key to avoiding clipping.
- File Size Tip:
Sending a test email to yourself and downloading it reveals the email’s size, allowing proactive adjustments. - Content Trimming:
Eliminate unnecessary content and use hyperlinks to redirect users when extensive information is unavoidable. - Image Size Considerations:
Resizing images doesn’t directly impact email size, but removing unnecessary images reduces associated code, aiding in size reduction. - Avoid Copy-Pasting Pitfalls:
Copy-pasting from external sources may introduce hidden formatting code. Pasting as plain-text helps sidestep unnecessary code. - HTML Minification:
Minify your HTML code to remove redundant characters, spaces, and code, reducing the risk of Gmail clipping.
- File Size Tip:
Subject Line Complexity:
Gmail may clip and thread messages with identical subject lines, often encountered in test emails. To prevent this, alter subject lines or delete previous test emails before sending new ones.
Formatting Challenges:
Designing emails with Brevo’s Rich Text Editor or pasting HTML code directly offers flexibility but can introduce excess code. This surplus code may lead to formatting issues, eventually contributing to Gmail clipping.
Formatting Best Practices:
When copy-pasting, use plain-text (CTRL+Shift+V on PC or Option+Shift+Cmd+V on MAC) to avoid introducing external formatting code.
You can’t embed forms directly in your newsletter.
However, you can add a link to the form in your email. This way, when receiving the email containing the form link, users will be automatically directed to the form webpage to fill-in information.
For example, if you want new customers to provide their email address, you can link your form in your newsletter. This way, customers will click the “Register to our newsletter!” button, enter their address and their information will be added to your mailing list.
To configure your default Reply-to email address:
Google Analytics
This guide explains how to integrate Google Analytics with your Sendimpactt account to understand which email campaigns drive traffic to your website.
Google Analytics: Your Website Traffic Tracker
Google Analytics is a popular tool that tracks and reports website traffic. By adding special codes (called "parameters") to your Sendimpactt email links, you can see how effective your campaigns are at directing people to your website.
Before You Begin:
- Monitor Your Website: Make sure your website is already tracked on your Google Analytics account.
- Link it Up: Include your website link in your Sendimpactt email campaigns and templates.
Understanding Parameters:
When you integrate Google Analytics with Sendimpactt, the platform automatically adds tracking codes to your email links. These codes, called "parameters," provide valuable information about your campaigns:
- UTM_Source: Identifies the source of the traffic (in this case, "sendimpactt").
- UTM_Medium: Specifies the marketing medium (in this case, "email").
- UTM_Campaign: Shows the name of your email campaign (e.g., "Summer Sale").
- UTM_ID (optional): Assigns a unique identifier to your campaign (optional, activated in Sendimpactt settings).
Example:
If your campaign is named "Summer Sale," the link would look like this:
http://www.example.com/?utm_source=sendimpactt&utm_medium=email&utm_campaign=summer-sale&utm_id=854
Integrating with Sendimpactt:
In Sendimpactt, you can enable Google Analytics tracking for:
- All campaigns and templates: Track links in all your emails.
- Specific campaigns and templates: Track links only in selected emails.
All campaigns: Track links in all your emails.
To enable Google Analytics for all your email campaigns and templates:
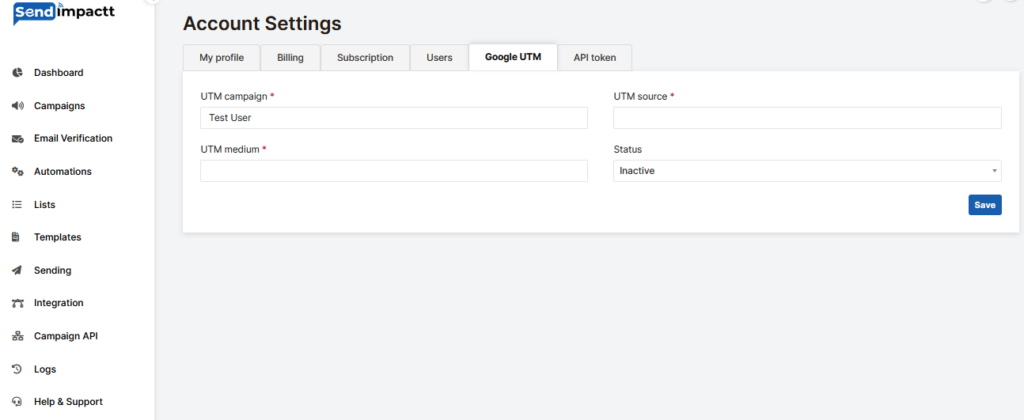
- 1. In your account, go to Settings > Google UTM.
- 2. Under Google UTM you will see the default values used for the campaign.
- 3. Enable the Activate Google Analytics Tracking option.
- (Optional) Enable the UTM_ID: ID_OF_YOUR_CAMPAIGN option to activate your campaign ID as an optional UTM parameter for Google Analytics.
- Click Save.
Now, every time you send an email campaign that contains a link to your website, Google Analytics will track its results.
To enable Google UTM for a specific email campaign
- When creating an email campaign, On the right side you will notice the Google UTM by default enabled.
(Optional) By default, the UTM Campaign Value is the name of your campaign.
(Optional) Check the box to activate the UTM ID as an optional parameter for Google Analytics.
Click Save.
Once you send this email campaign, Google Analytics will track its results.
Analytics you will be able to see these statistics.
Once your email campaigns are sent, you can see how many people clicked through to your website:
- Log in to your Google Analytics account.
- Go to Reports > Acquisition > Traffic Acquisition.
- Sort the results by clicking the Session default channel group dropdown and choosing the desired parameter:
- UTM_Source: Select Session source and look for "sendimpactt".
- UTM_Medium: Select Session medium and look for "email".
- UTM_Campaign: Select Session campaign and look for your campaign name.
- UTM_ID: Select Session campaign id and look for your campaign ID.
By integrating Google Analytics with Sendimpactt, you gain valuable insights into your email campaign performance, allowing you to optimize your marketing efforts for better results.

