Email Templates
- HelpCenter
- Email Templates
General
In Sendimpactt, you can create email templates in several cases and their use will be different each time:
- Email templates for Email campaigns
- Email templates for Marketing automation emails
For Email campaigns, you can see email templates as a way of building your campaigns quicker.
For Automation emails, however an email template is the email that will be sent to your contacts so it must be ready to be sent!
Email campaigns:
For email campaigns, an email template is a preset design that you will use to build your campaigns. Using an email template for email campaigns can be a good idea if you want to:
- Reuse an email layout for future campaigns
- Match your brand image in all email campaigns
- Speed up the email campaign creation process by inserting regularly used images, logos, or recurring content
You will then need to update the content of the template with the information you want to send to your contacts.
Here is an example of what an email campaign template can look like:
When creating an email campaign, you can choose one of your email templates under the My Template tab in the Design section.
Marketing Automation
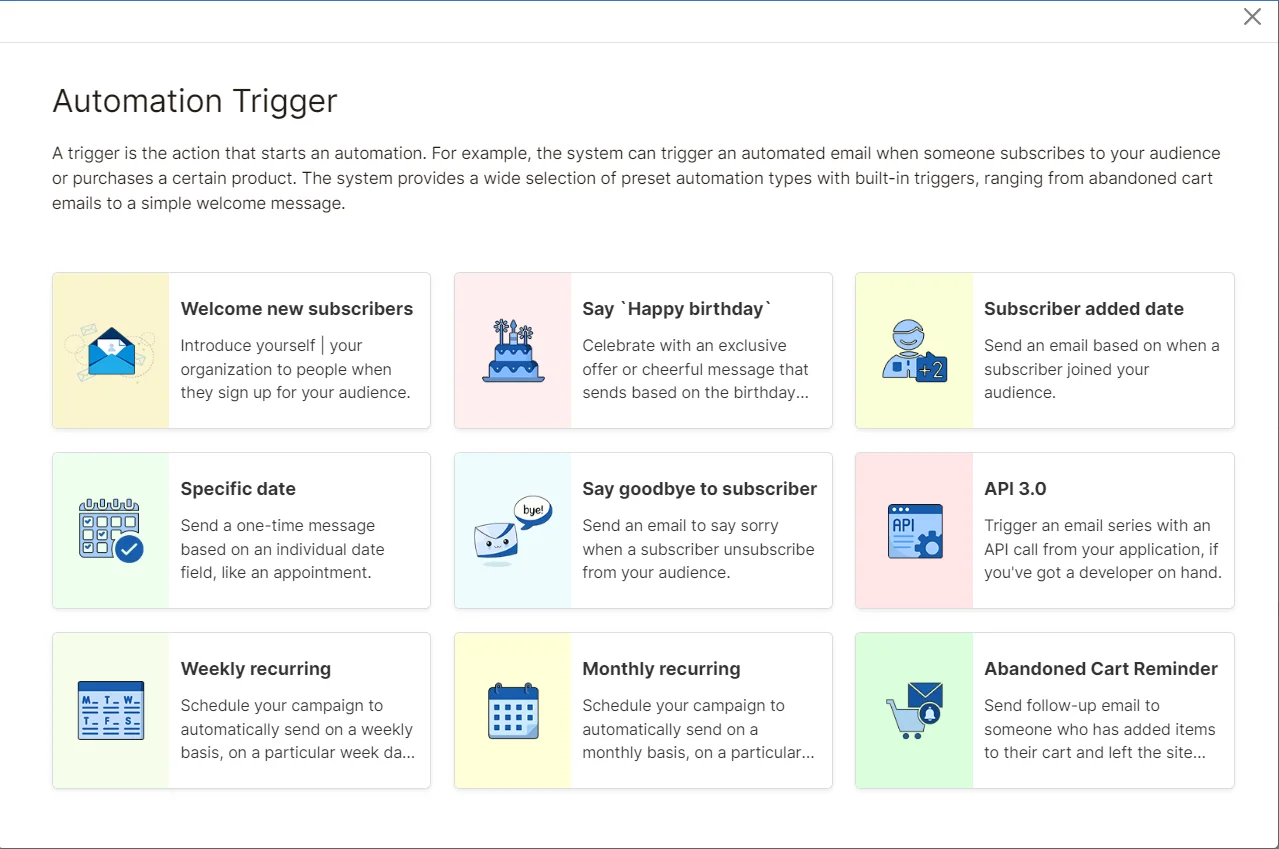
Marketing Automation allows you to send an automated email or email series in response to a trigger condition pre-defined in an automation workflow. The trigger can be related to customer behavior, preferences, or other personal/demographic information.
For Marketing Automation, an email template is a predefined email sent as part of an automation workflow. It must be ready to be sent as it is, with all text, images, and placeholders added to the design.
Here are some examples of email templates you can use for automation:
- Sending a birthday email with a special offer or discount
- Triggering a welcome email when new subscribers join your email list
- Sending an onboarding email series to new customers (an important part of your CRM strategy)
- Automated drip campaigns
- Sending targeted offers based on landing pages visited (great for ecommerce)
Here is an example of what an email template used in Marketing Automation can look like:
Sendimpactt offers various template options to help you craft the perfect look for your email marketing endeavors. Incorporate your logo and select colors and fonts that align with your brand, enabling you to establish a reusable design for upcoming email campaigns.
In this guide, you'll discover how to create an email template effortlessly.
Before You Begin
Here are a few key points to note before diving into template creation.
Your plan may restrict access to certain template options. Refer to our pricing page for plan details. You can change your plan type on the plans page in your account.
If you're uncertain about which template to choose, explore our various options to find the best fit.
Ensure your template displays correctly by adhering to our image requirements for content blocks.
Modifying a custom-coded template may impact existing campaigns using the same template. Changes to a drag-and-drop template won't affect existing campaigns.
For the Email Builder
Sendimpactt's new builder boasts an array of template options. Utilize filters to refine your choices, opt for a saved template, or code your own.
To create a template for the new email builder, follow these steps:
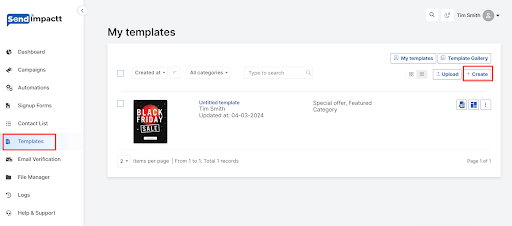
Click Template
- My templates
- Template Gallery
- Upload
Click Create template.
Create
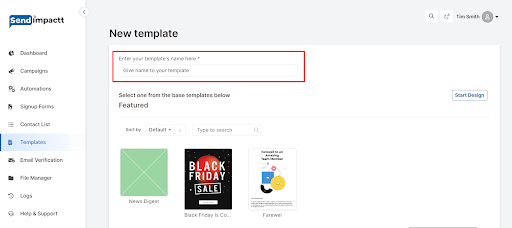
Give name to your template:
In the Template choose the template you would like to create/edit,
Select the template and click on Start design
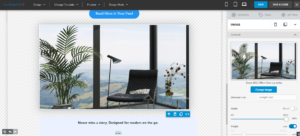
Drag and drop content blocks into your template layout to add and format text, products, images, files, and other content as needed.
Preview your template to see its appearance on desktop and mobile. Click Inbox to view how your email appears in various email clients.
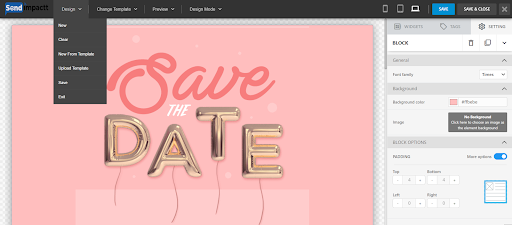
The drag and drop editor has the following options:
Design:
Change template
Preview
Design mode : design and source code
On the right side you will have a widgets, tags and settings
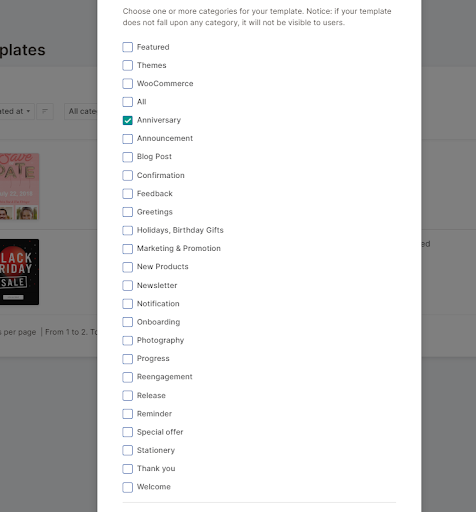
You can drag and drop the required things and click on save & assign the category to the template.
Optional: To send a test email, click the Save Template and Exit dropdown, then select Send test email. Enter the recipient email addresses and click Send test.
When ready, click Save Template and Exit.
Your new template is now available for use on the Templates page or within the my templates
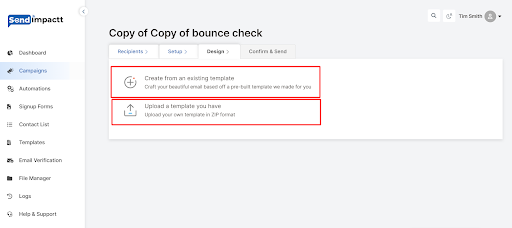
Sendimpactt offers 50+ pre built ready to use templates that can easily be access while creating a campaign
- Click on create from an existing template and start editing
Upload:
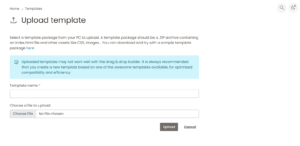
You can upload the template
Select a template package from your PC to upload. A template package should be a .ZIP archive containing an index.html file and other assets like CSS, images... You can download and try with a sample template package here
Uploaded templates may not work well with the drag & drop builder. It is always recommended that you create a new template based on one of the awesome templates available, for optimized compatibility and efficiency
Code Your Own: Missing feature: its available when we get inside the editor .
When crafting an email campaign in Sendimpactt, you'll typically start with one of our templates. Choose from a variety of options designed with different business goals and styles in mind, or code your own template from scratch.
In this guide, you'll explore the various types of templates available, helping you determine which one best suits your needs.
For the Pro Builder
Templates for our Pro email builder offer inline editing, allowing you to make changes directly in the design. Regardless of the template you choose, you can add or remove different content blocks and customize the styles as needed.
To access them, navigate to the Templates page and click Create Template. For detailed instructions, refer to Create an Email Template.
Sendimpactt's Email builder provides numerous template options. Utilize filters to narrow your choices, use a saved template, or code your own. Here are some of the There are 21 Sendimpactt templates available for the Email builder:
Edit an email template
- Go to Campaigns > Templates.
- In the Active or Inactive tab, search for the email template that you want to edit.
- Click Edit next to it.
- Edit the setup and/or design of the email template:
- Click Setup to rename your template, change its subject line and From name, add an attachment, etc.
- Click Design > Edit the email content to change the layout and content of your email template.
- Once you are done, click Save & Activate or Save & Quit if you do not want to activate your template now.
Import a template
Click Import this template.
- Use a template for an email campaign
- Use a template in a Marketing Automation workflow
Drag & Drop email editor
Use a template for an email campaign
The width of the email template is 640px.
A background image can be added to the whole campaign or to a particular section.
To add a background image to the whole campaign, click “Design settings”, on the right side, you will see Background image option in the “Template settings” section. Click “Change” and choose an image that you want.
To add a background image to a section of the campaign, click on the section that you want to add the image to. On the right side, you will see Background image option in the “Section settings” section. Click “Change” and choose an image that you want.
After creating a campaign, to make sure it looks the way you intend it to, check the way it will be displayed on desktop and mobile. To do that, in the Drag and Drop editor, click the “Email preview” button.
You will then be presented with how the campaign will be displayed on desktop and mobile. Here is a video on how it looks in action:
You can check the email preview once more at the last step of the campaign creation. Simply click the “Preview” button as indicated here:
If you want your customers to be able to call you straight from your sent campaign, you should consider implementing a visible Call now button in the newsletter’s body. Creating a “Call now” button is pretty simple – first, you will need to insert a button element into the selected section.
Now when the recipient clicks on the button, an option to call the selected phone number will emerge.
To configure your default Reply-to email address:
- Go to Campaigns > Settings.
- Select Default Settings.
- In the Default campaign settings section, enter the default Reply-to email address in the [DEFAULT_REPLY_TO] field.
This Reply-to email address will be used by default for every email campaign that you send.
Configure a Reply-to email address for a single email campaign
You can also change the Reply-to email address specifically for a single email campaign:
- At the From step of your campaign creation, click Advanced options.
- In the Customize the Reply-To Email address field, enter the Reply-to email address that you want to use specifically for this email campaign.
This Reply-to email address will be used specifically for this single email campaign.


